
In MMSMOA, Dave, Timmy and me, we presented how to make Flow custom connector for Microsoft Intune. I mentioned I have build an “automation solution” for Autopilot and promised I will write blog post about t. 🙂
Hope you understand, when I came up with idea, it was last year 2018 August. In that time we are still using Windows 1709 and 1803, there wasn’t “AutopilotConfigurationFile.json” file that we can use, and there wasn’t any other option to convert existing Azure AD joined devices to Autopilot, so this “solution” might be already outdated now, but perhaps you can still find something useful in this post. Example make custom connector for Microsoft Intune features.
The idea of making your own connector is not just about Autopilot, you can basically make custom connector for any Microsoft Graph API calls, and then use that with other connectors do any kind of automation actions, and you can use that make Power Apps as well.
How does it work
- Use PowerScript get devices serialNumber and hardware hash, use OrderIdentifier for identify different customers’ machine, you can also assign the device to user using assignedUserPrincipalName variable.
- After it collects those information, it sends HTTP request to Microsoft Flow.
- I have made a flow to revieve this HTTP request, it will use my custom Autopilot connector import device to Autopilot and send results via email.
NOTE
Before you start, you should have already configured all the requirements for Autopilot. You need to create Azure AD dynamic group to collect those imported Autopilot devices, and assigned Autopilot profile to the Azure AD dynamic group. I don’t cover these details in this post.
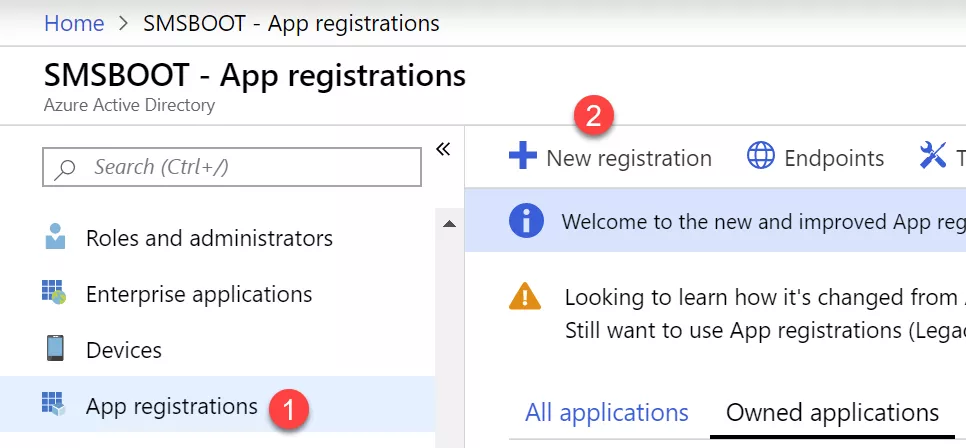
Create Azure Application
- Go to your Azure Portal, Click on Azure Active Directory, click on App registrations, then New registration
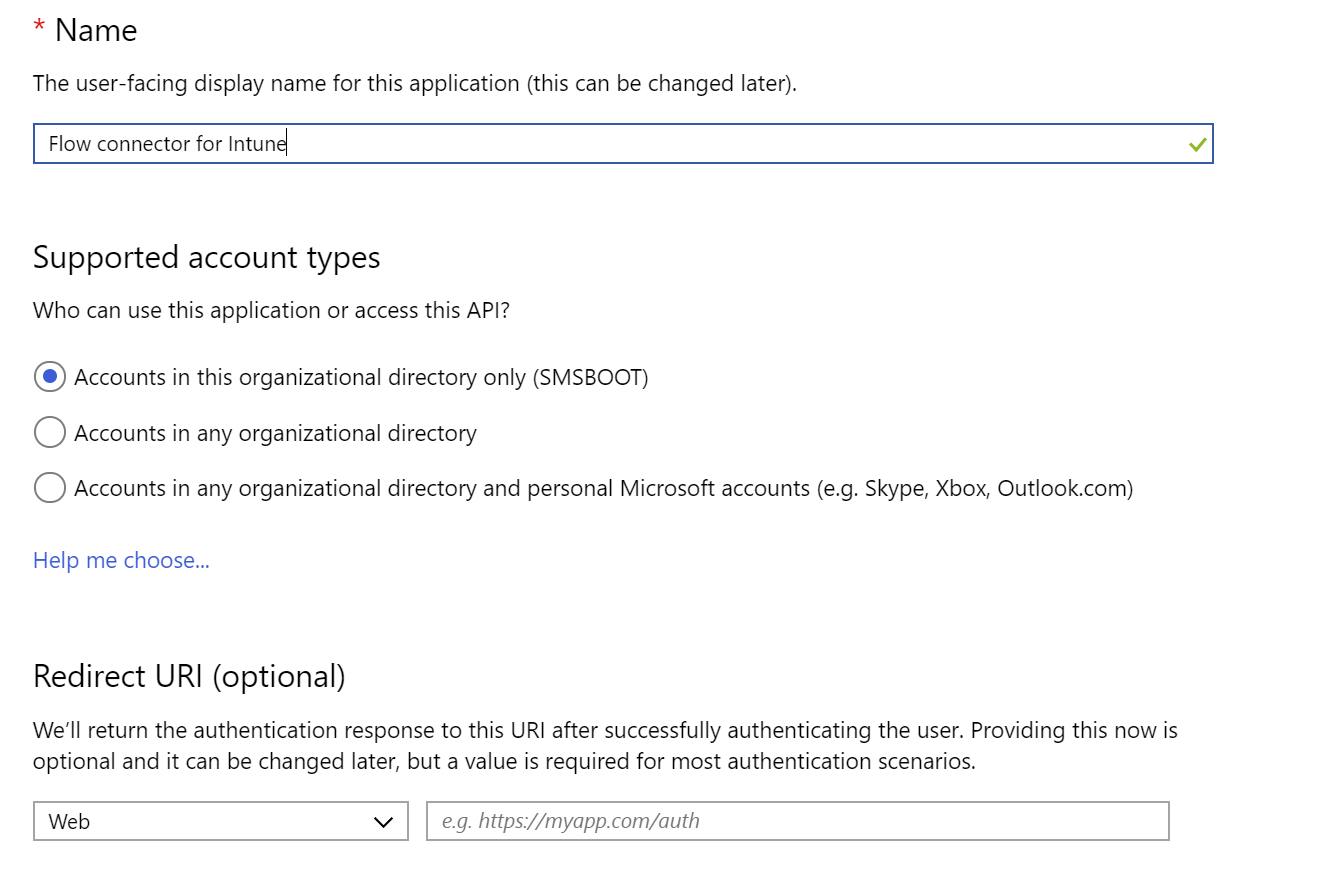
- Input a name example Flow connector for Intune. Supported account types choose organizational directory only. You can also use any organizational directory, if you manage multiple tenants and wants use this app to all your tenants.
Redirect URI, choose Web, and leave value empty
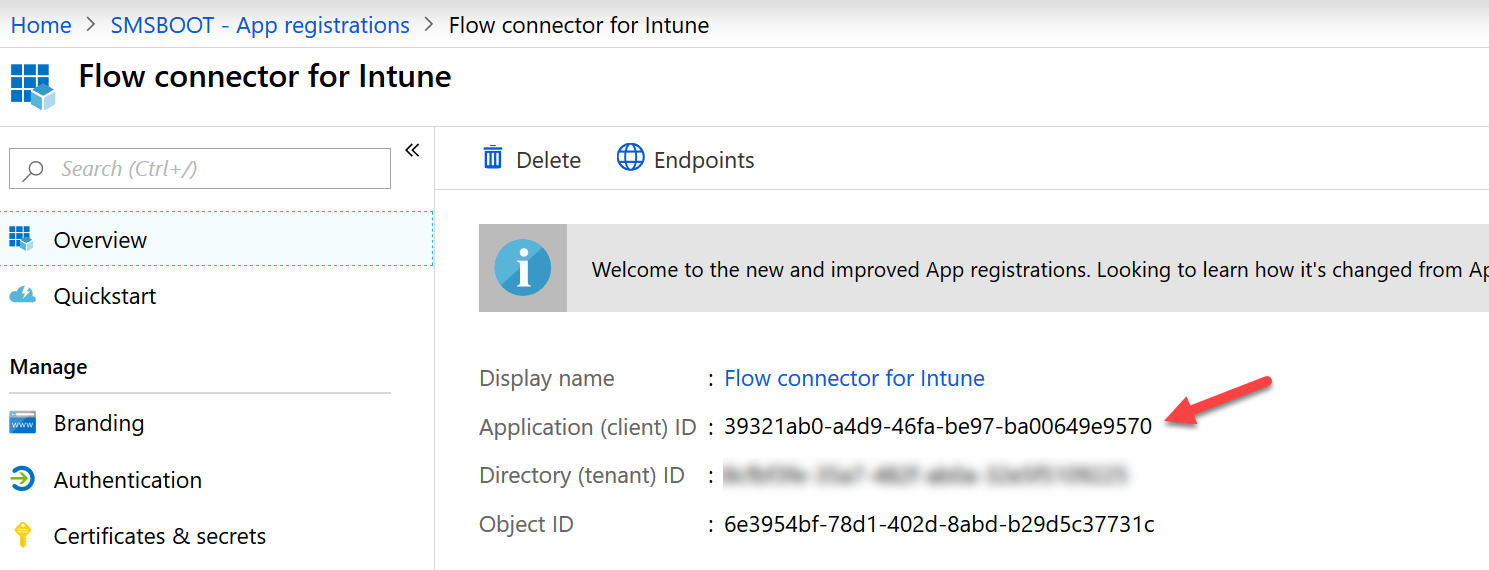
- After application is created, in Overview page you will see Application (client) ID, write down this ID, you will need that later for creat flow custom connecotor
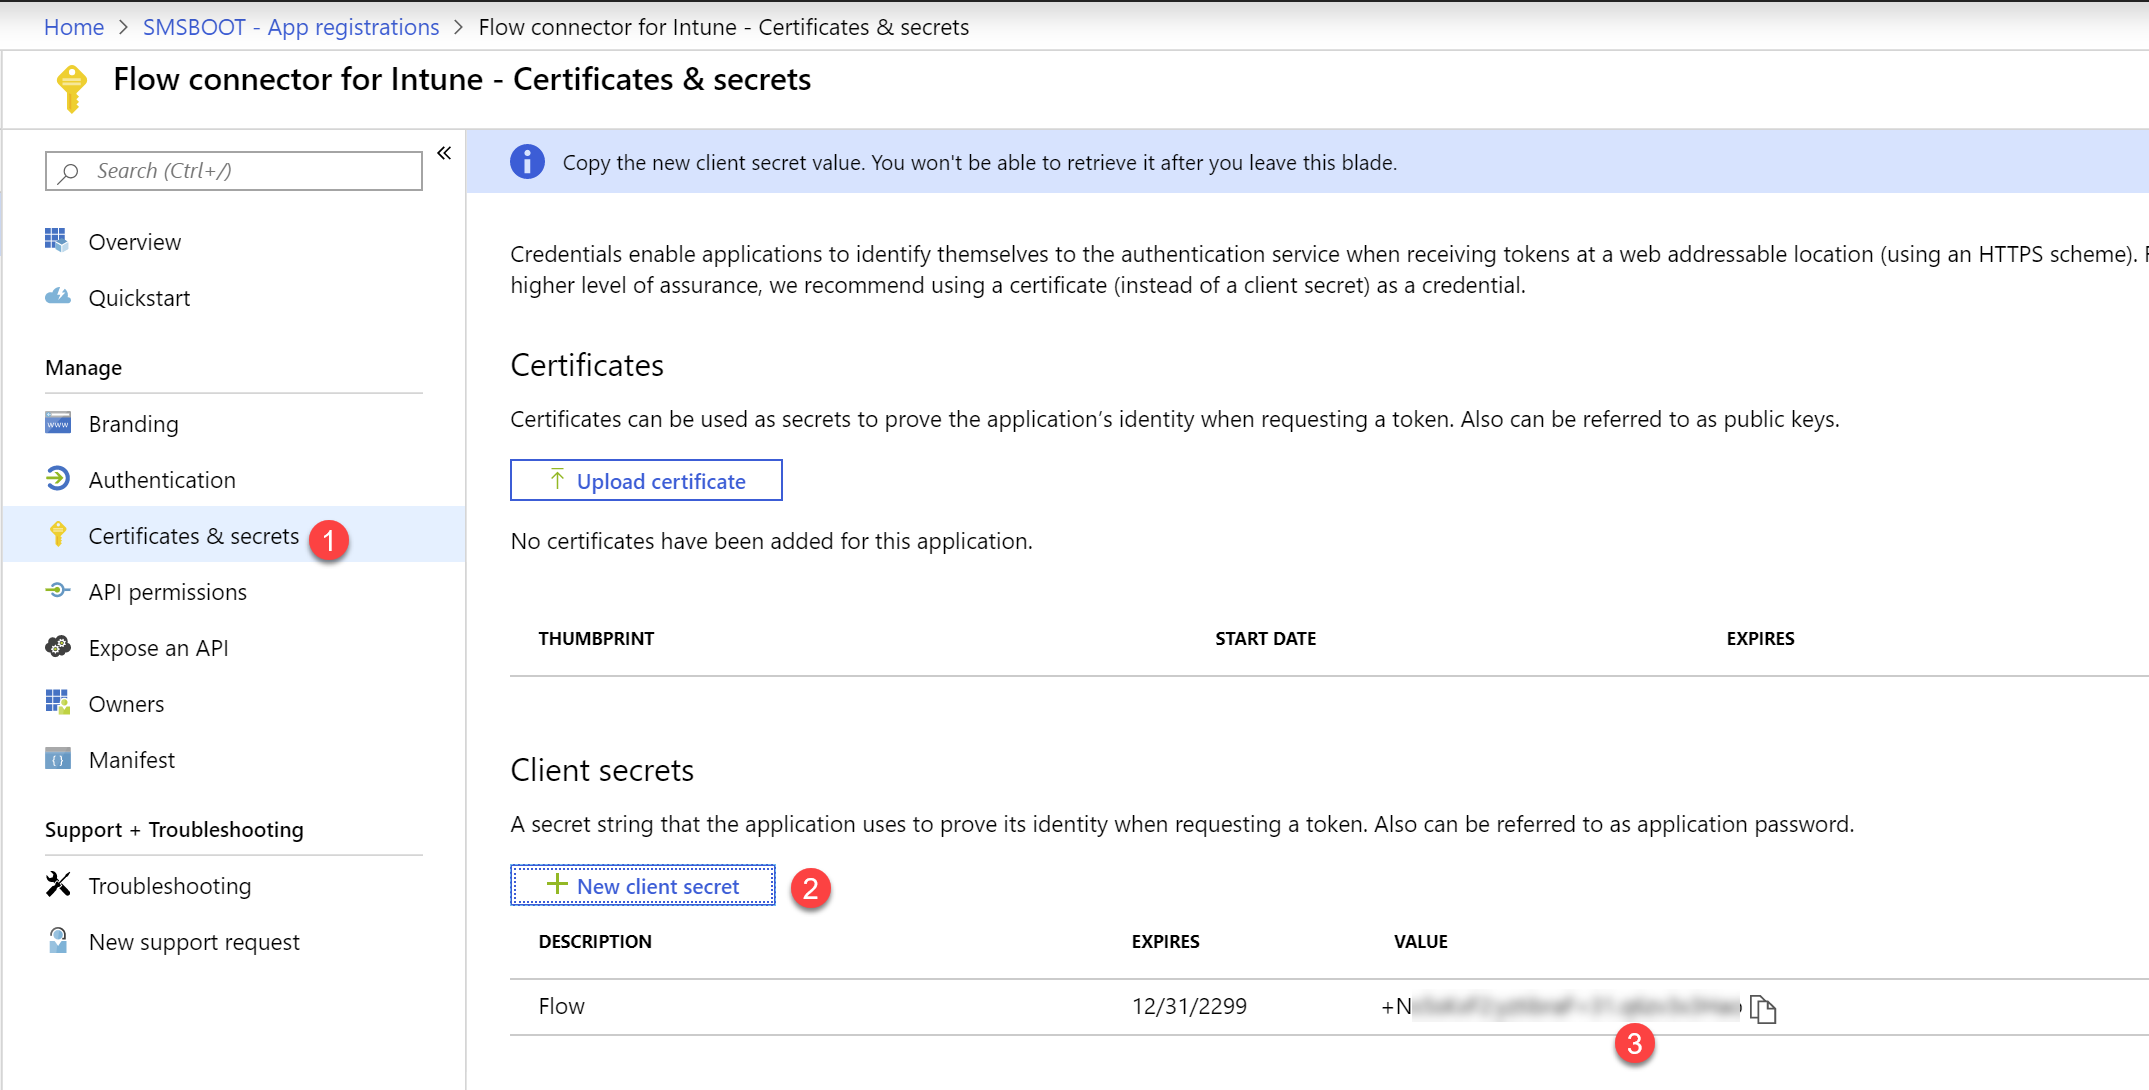
- Click on Certificates & secrets, then add a New client secret, remember copy the new client secret value to somewhere, you will need that later
- Click on API permissions, choose Microsoft Graph, then add Delegated permissions: DeviceManagementServiceConfig.ReadWrite.All and DeviceManagementServiceConfig.Read.All
And Grand admin consent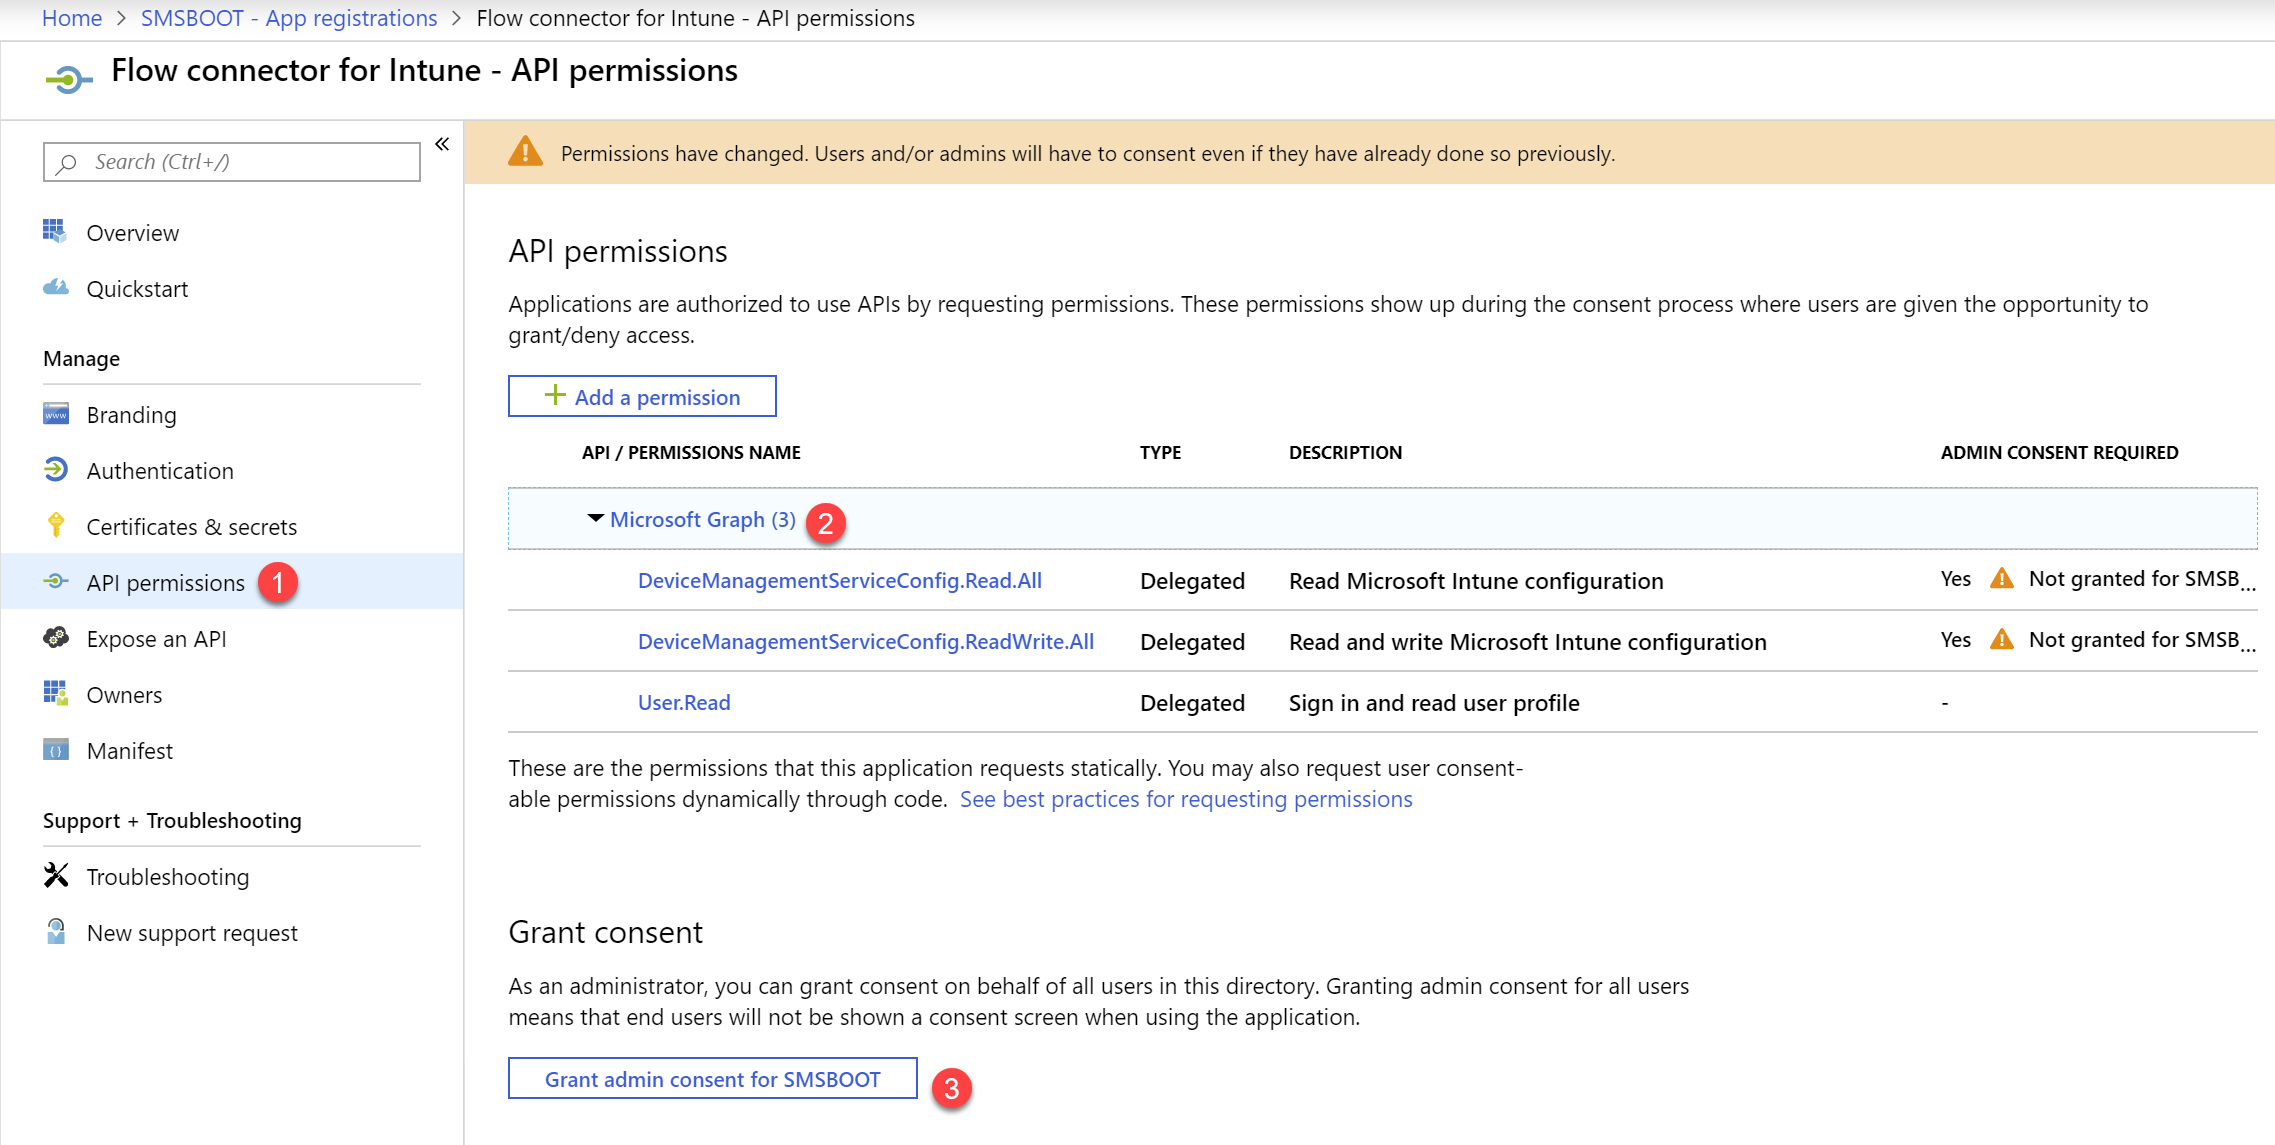
Create a new Intune Role (RBAC) for Autopilot
In here we are going to create a Intune Role that has minimum permission for import Autopilot devices
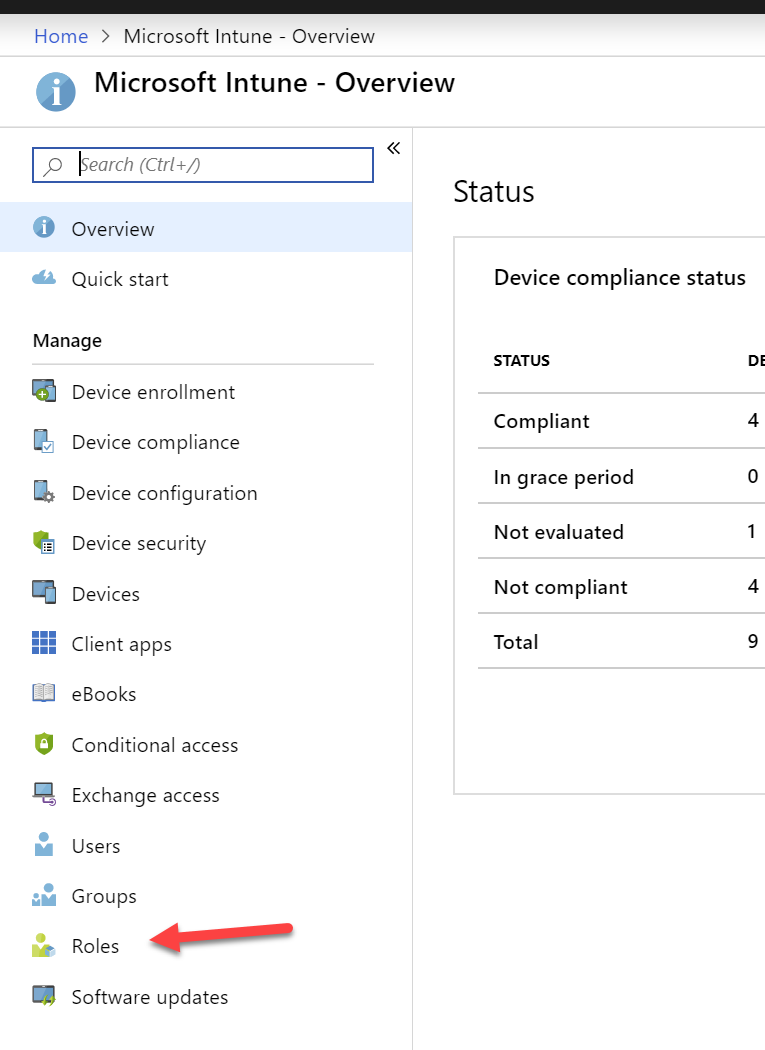
- Select Intune, click on Roles
- Click on All roles, then Add a new role
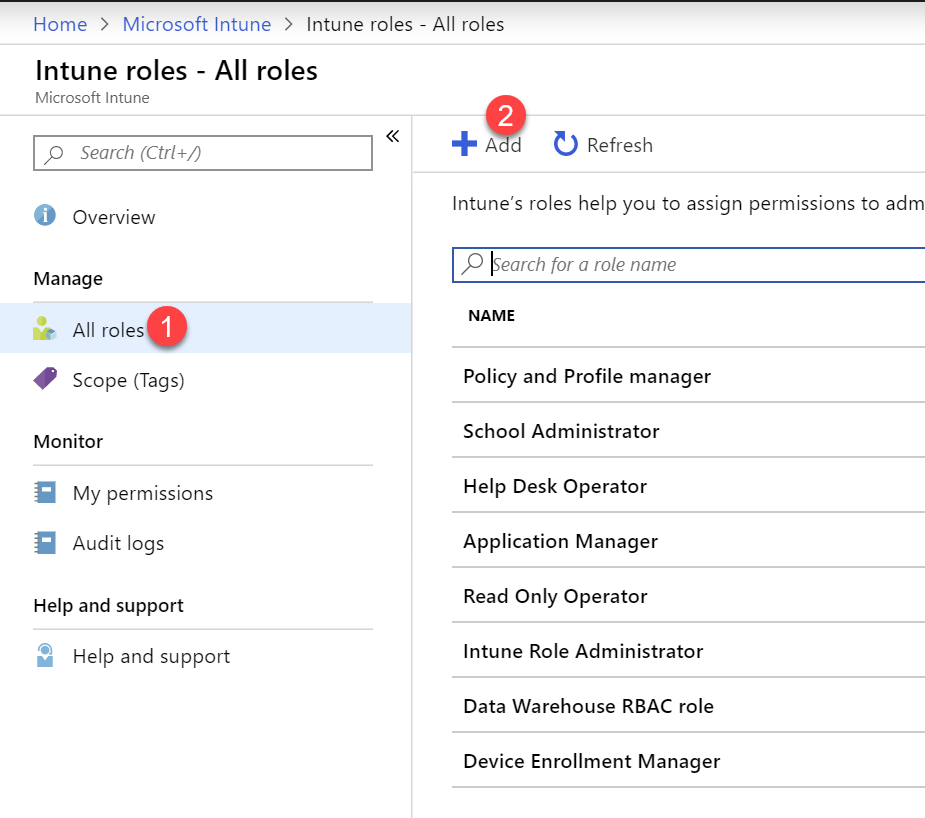
- Create a new role name Flow Autopilot
Minimum permission for import Autopilot device is Enrollment programs – Create device , you can adjust these permissions as your own needs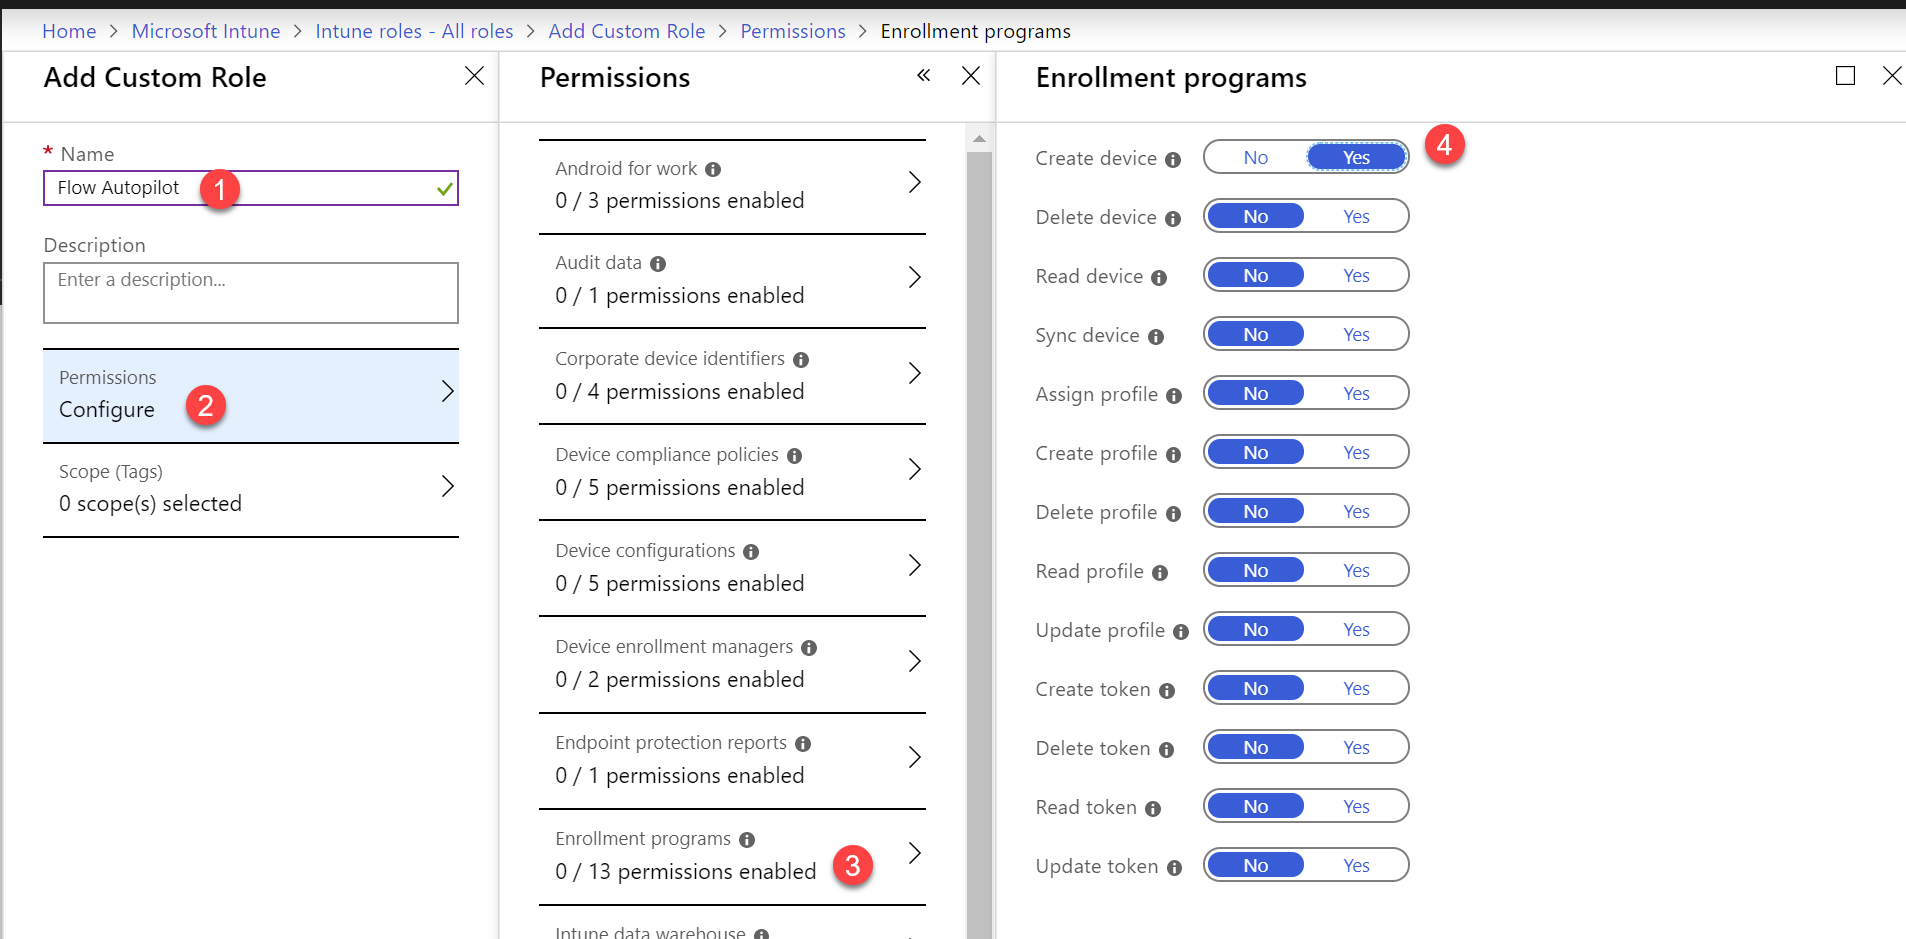
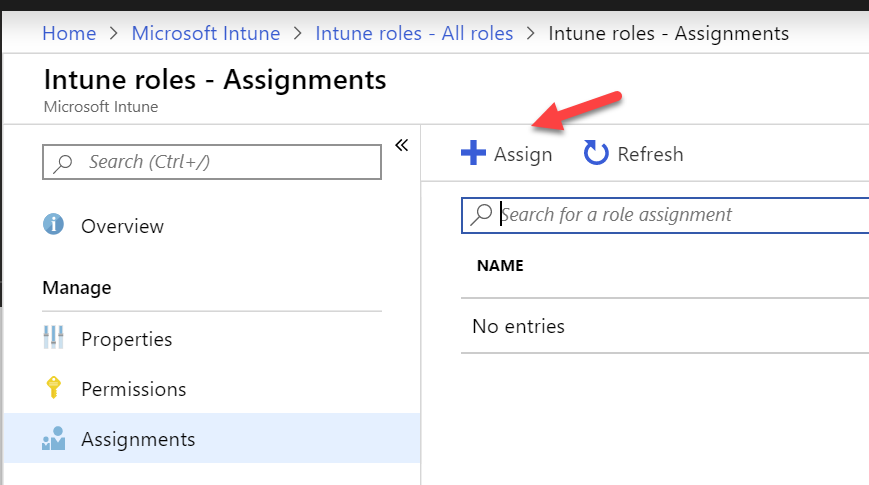
- Save and create this new custom role, then open it again from the list. Click on Assignments – Assign
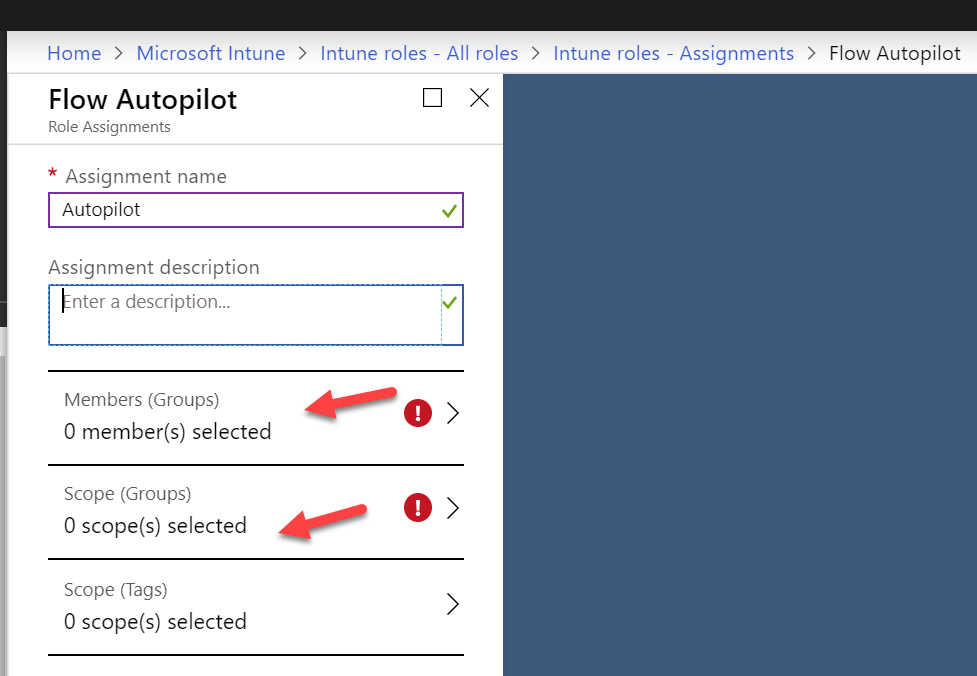
- Input Assignment name, then choose a Group that you will allow member the the group import Autopilot devices (You need to create first a group and add the user as member)
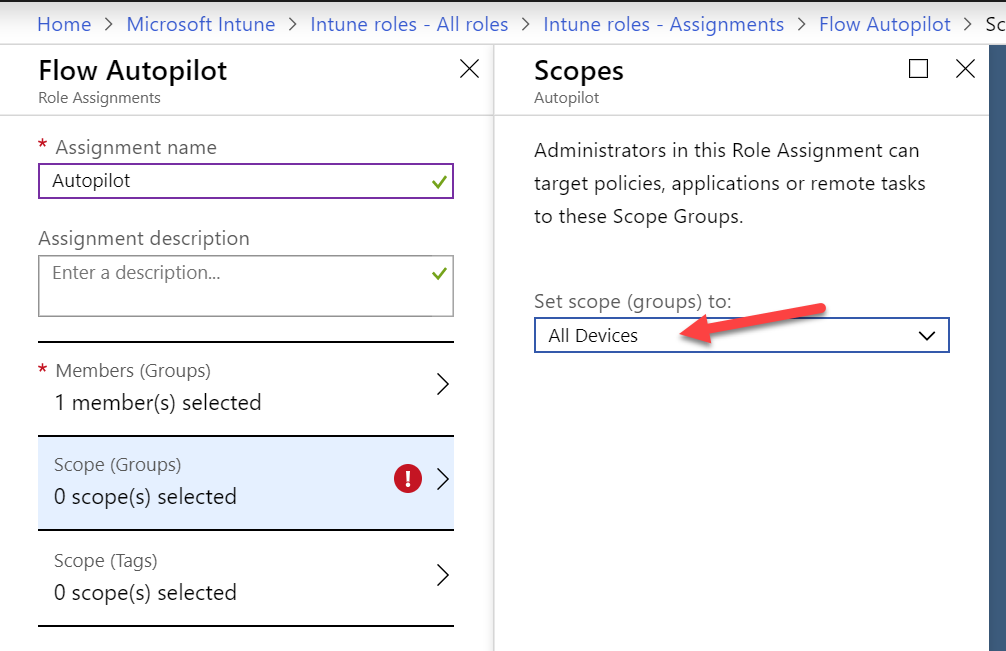
- In Scope (Groups), select All Devices
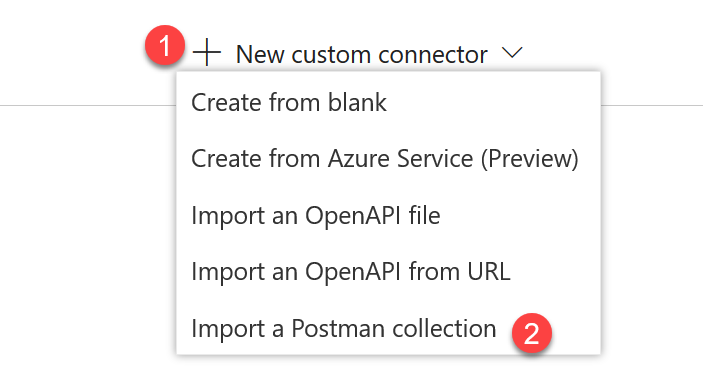
Create custom connector from Postman collection
I have already created all the Autopilot related Graph API calls in Postman collection, download it from my GitHub, if you are interested how to create your own Postman collection, please read this documents https://docs.microsoft.com/en-us/connectors/custom-connectors/create-postman-collection
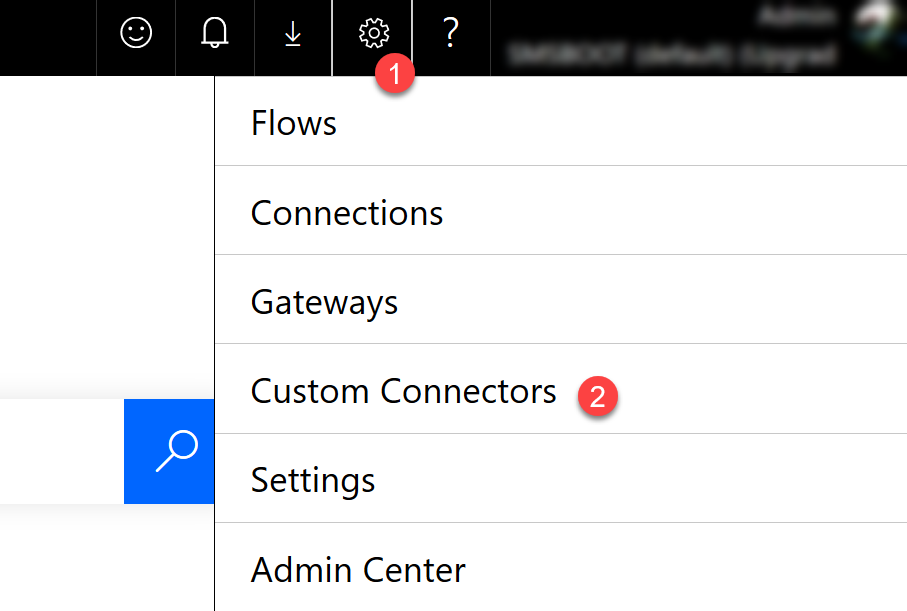
- Go to Flow portal https://flow.microsoft.com/
- Click on the setting icon, then choose Custom Connectors
- Click on New custom connector, choose Import a Postman collection
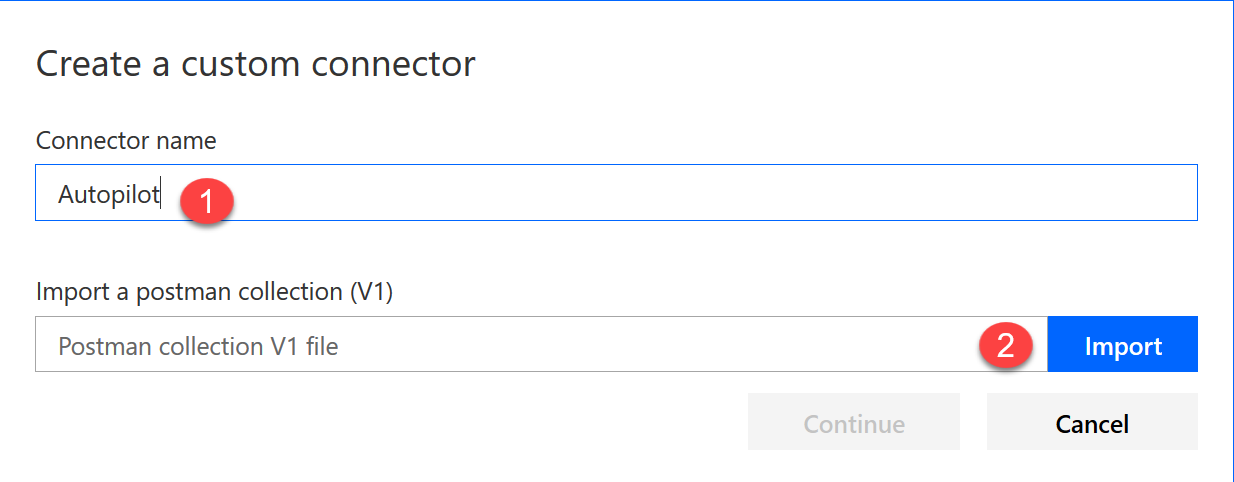
- Input Connector name anything you like, I put here Autopilot, click on Import, then choose the Windows Autopilot.postman_collection.json that you downloaded from my GitHub, then click on Continue
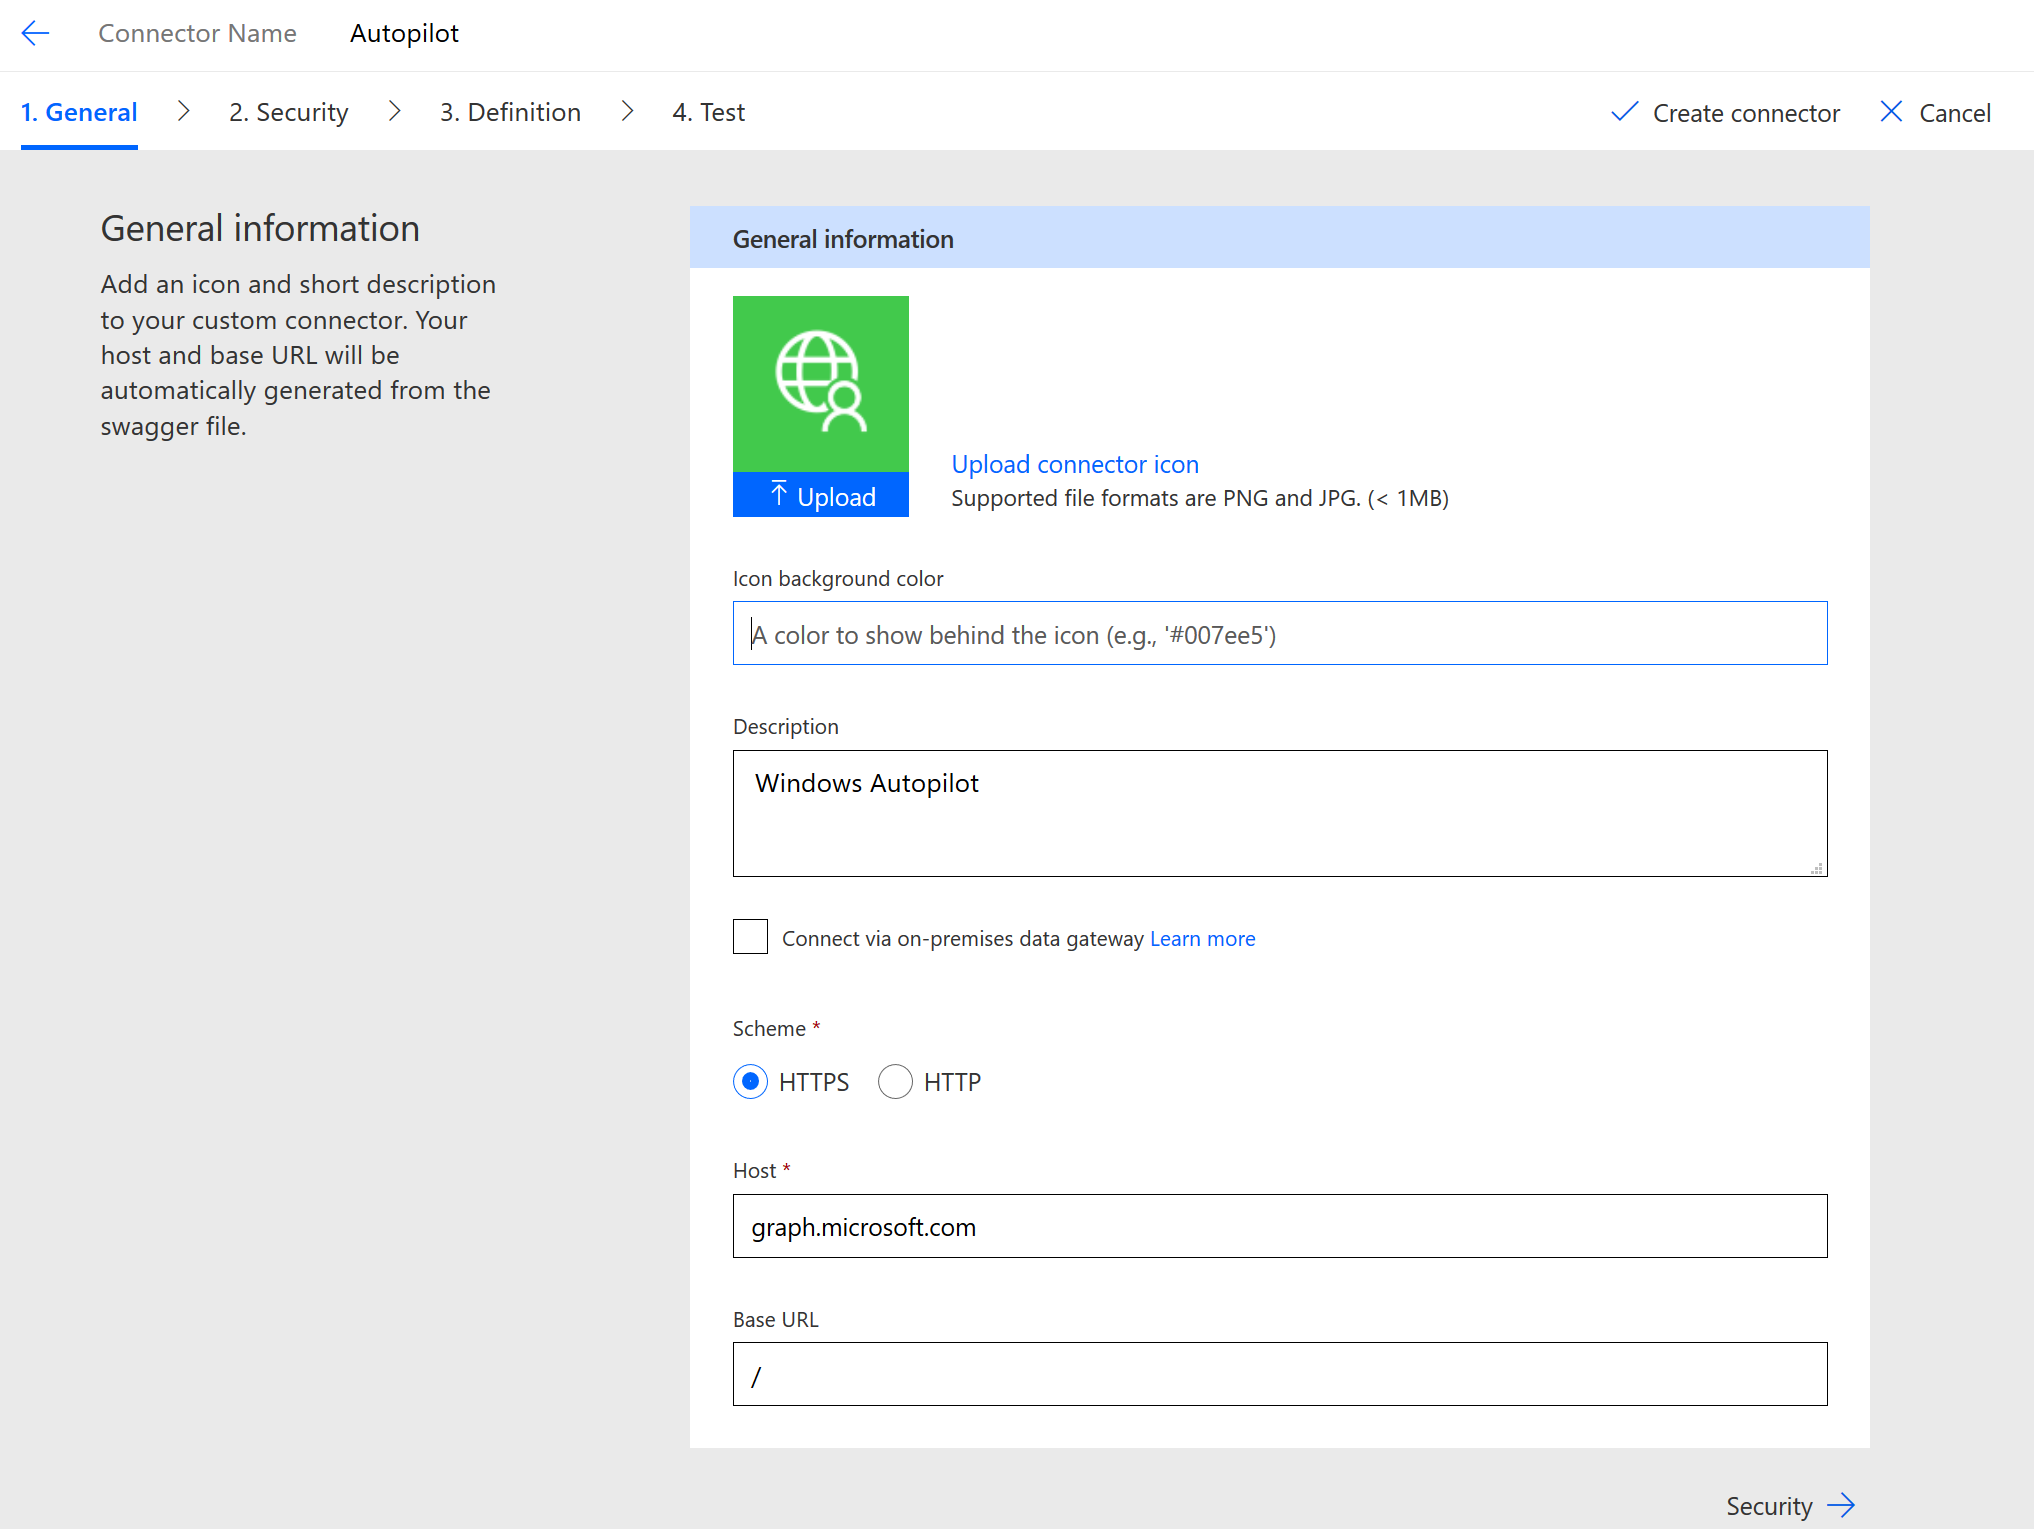
- In General page, you can upload custom icon, choose icon background color, leave other settings as default, click on Security
- Choose and input these following settings
Authentication type: OAuth 2.0
Identify Provider: Azre Active Directory
Client id: Your Azure application client ID (the one we just created)
Client secret: The secret key we genarated in the Azure appliction
Resource URL: https://graph.microsoft.com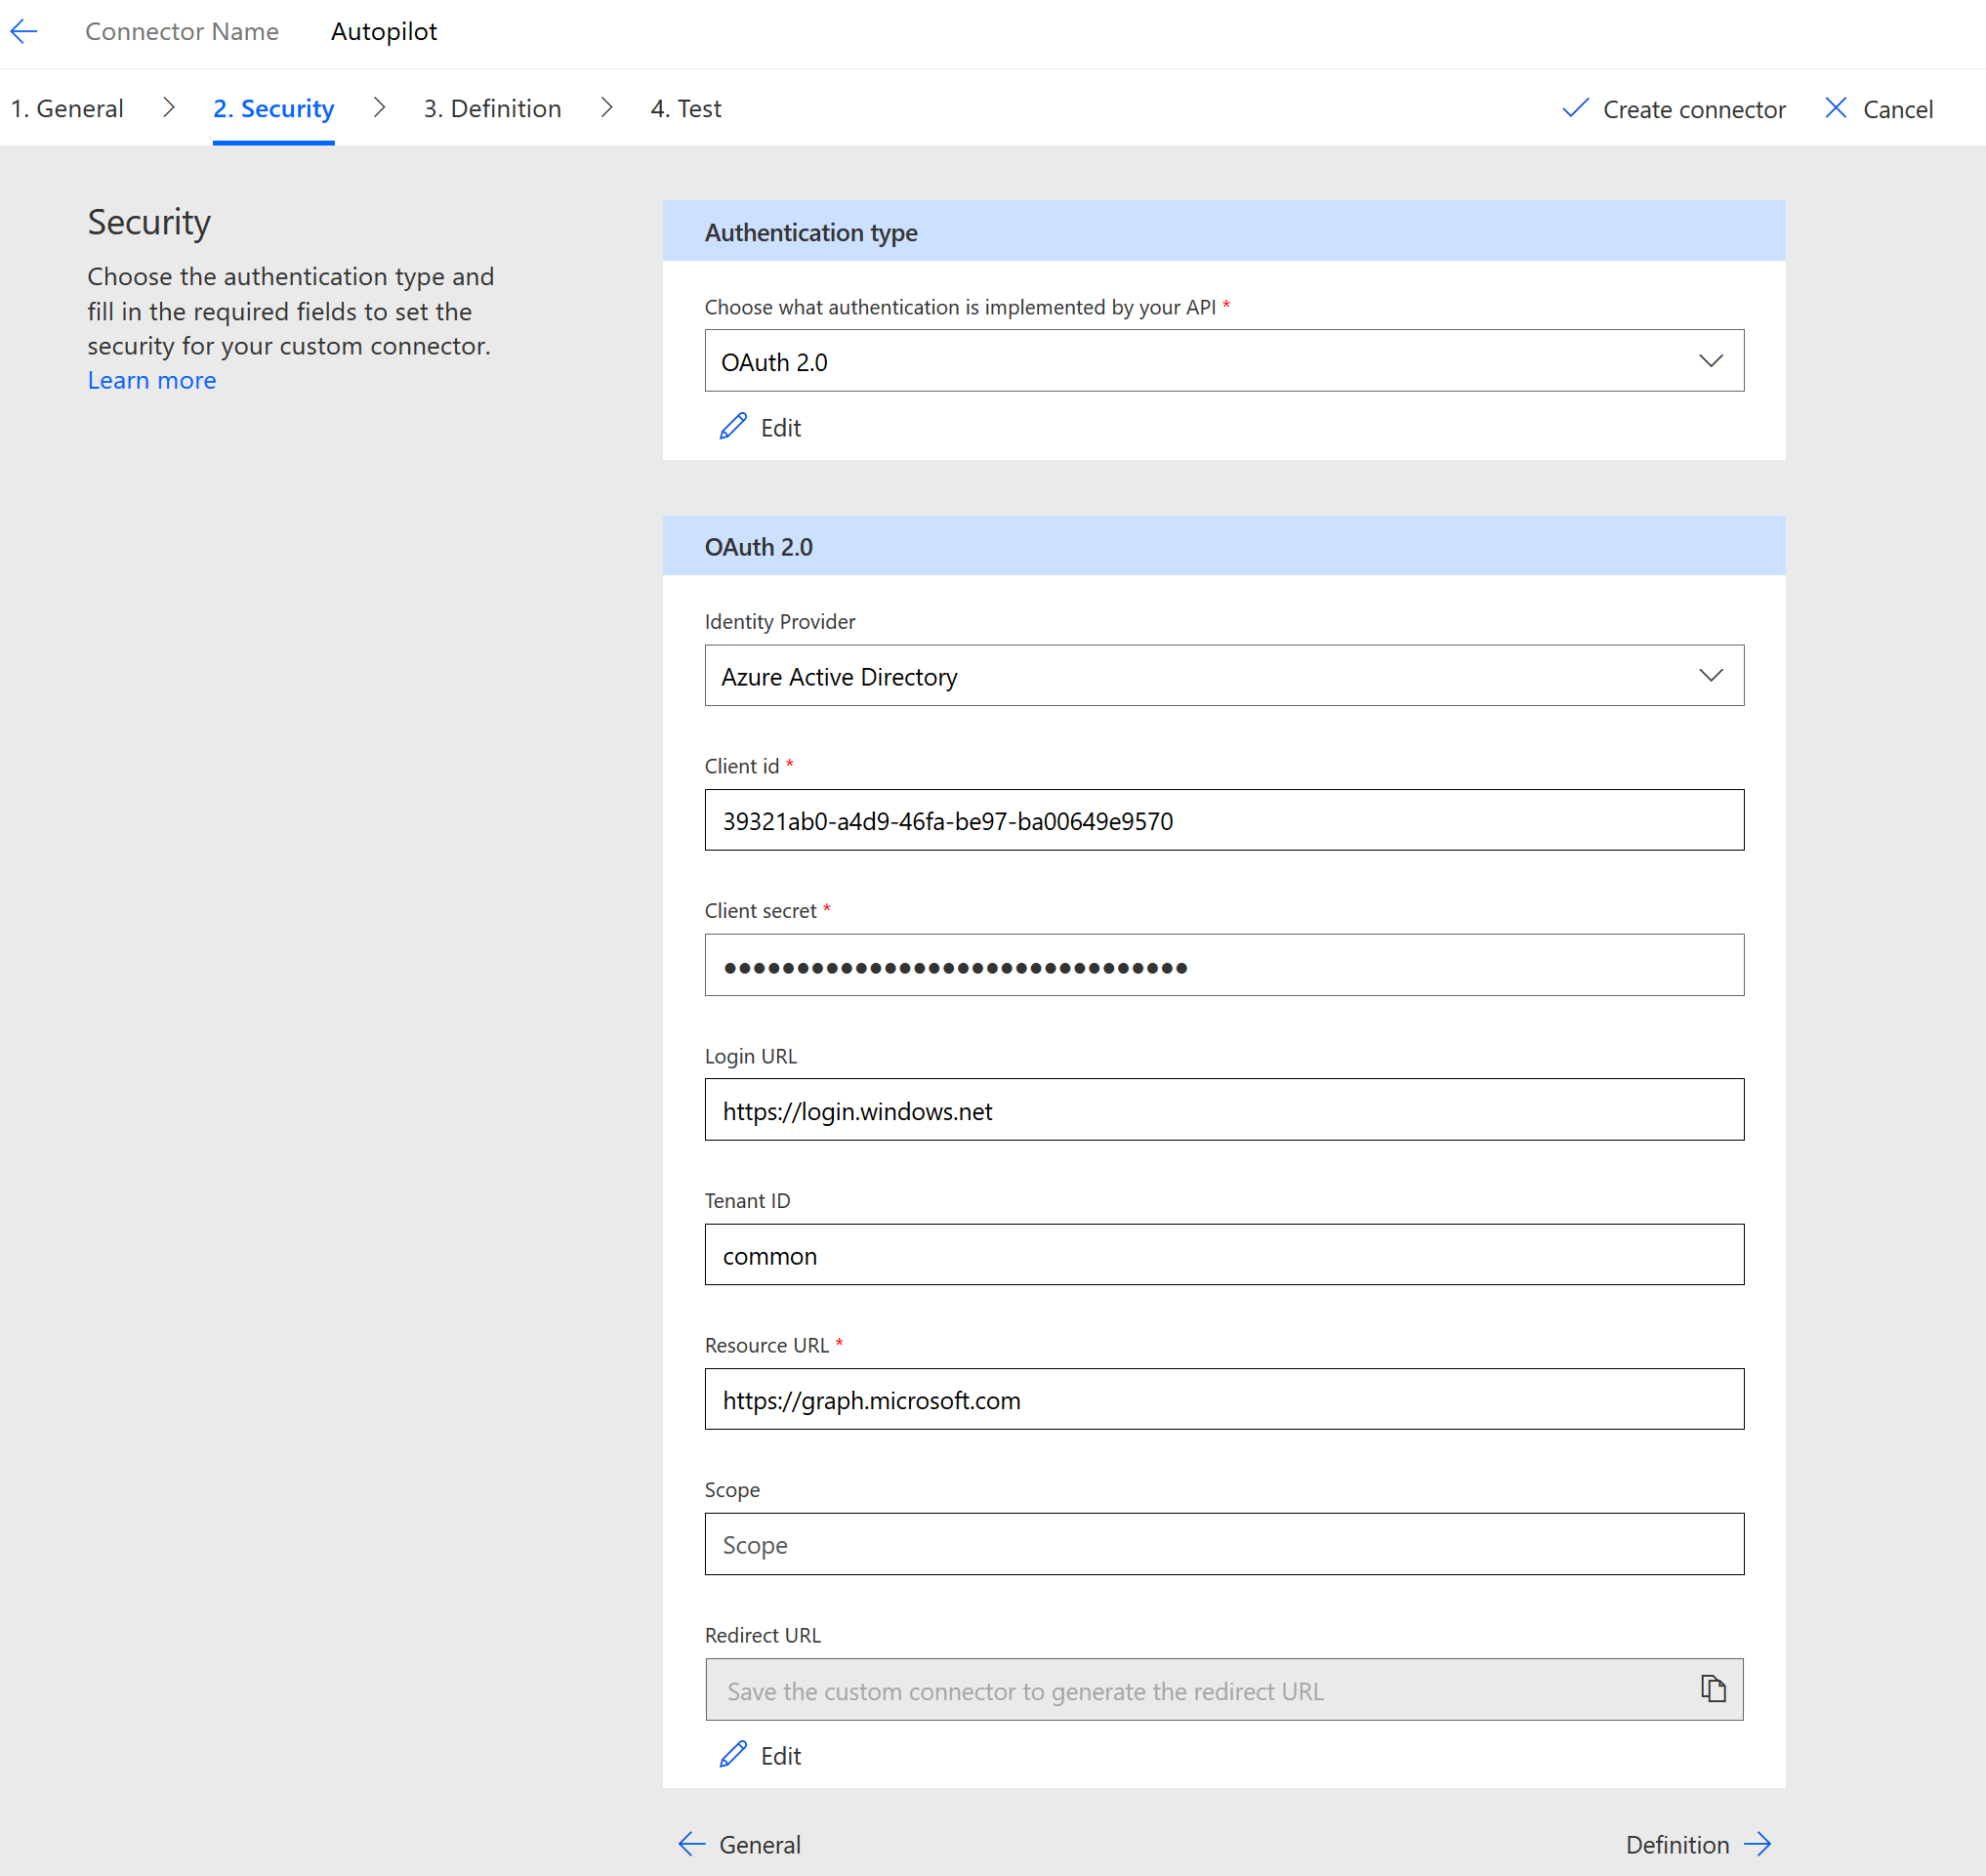
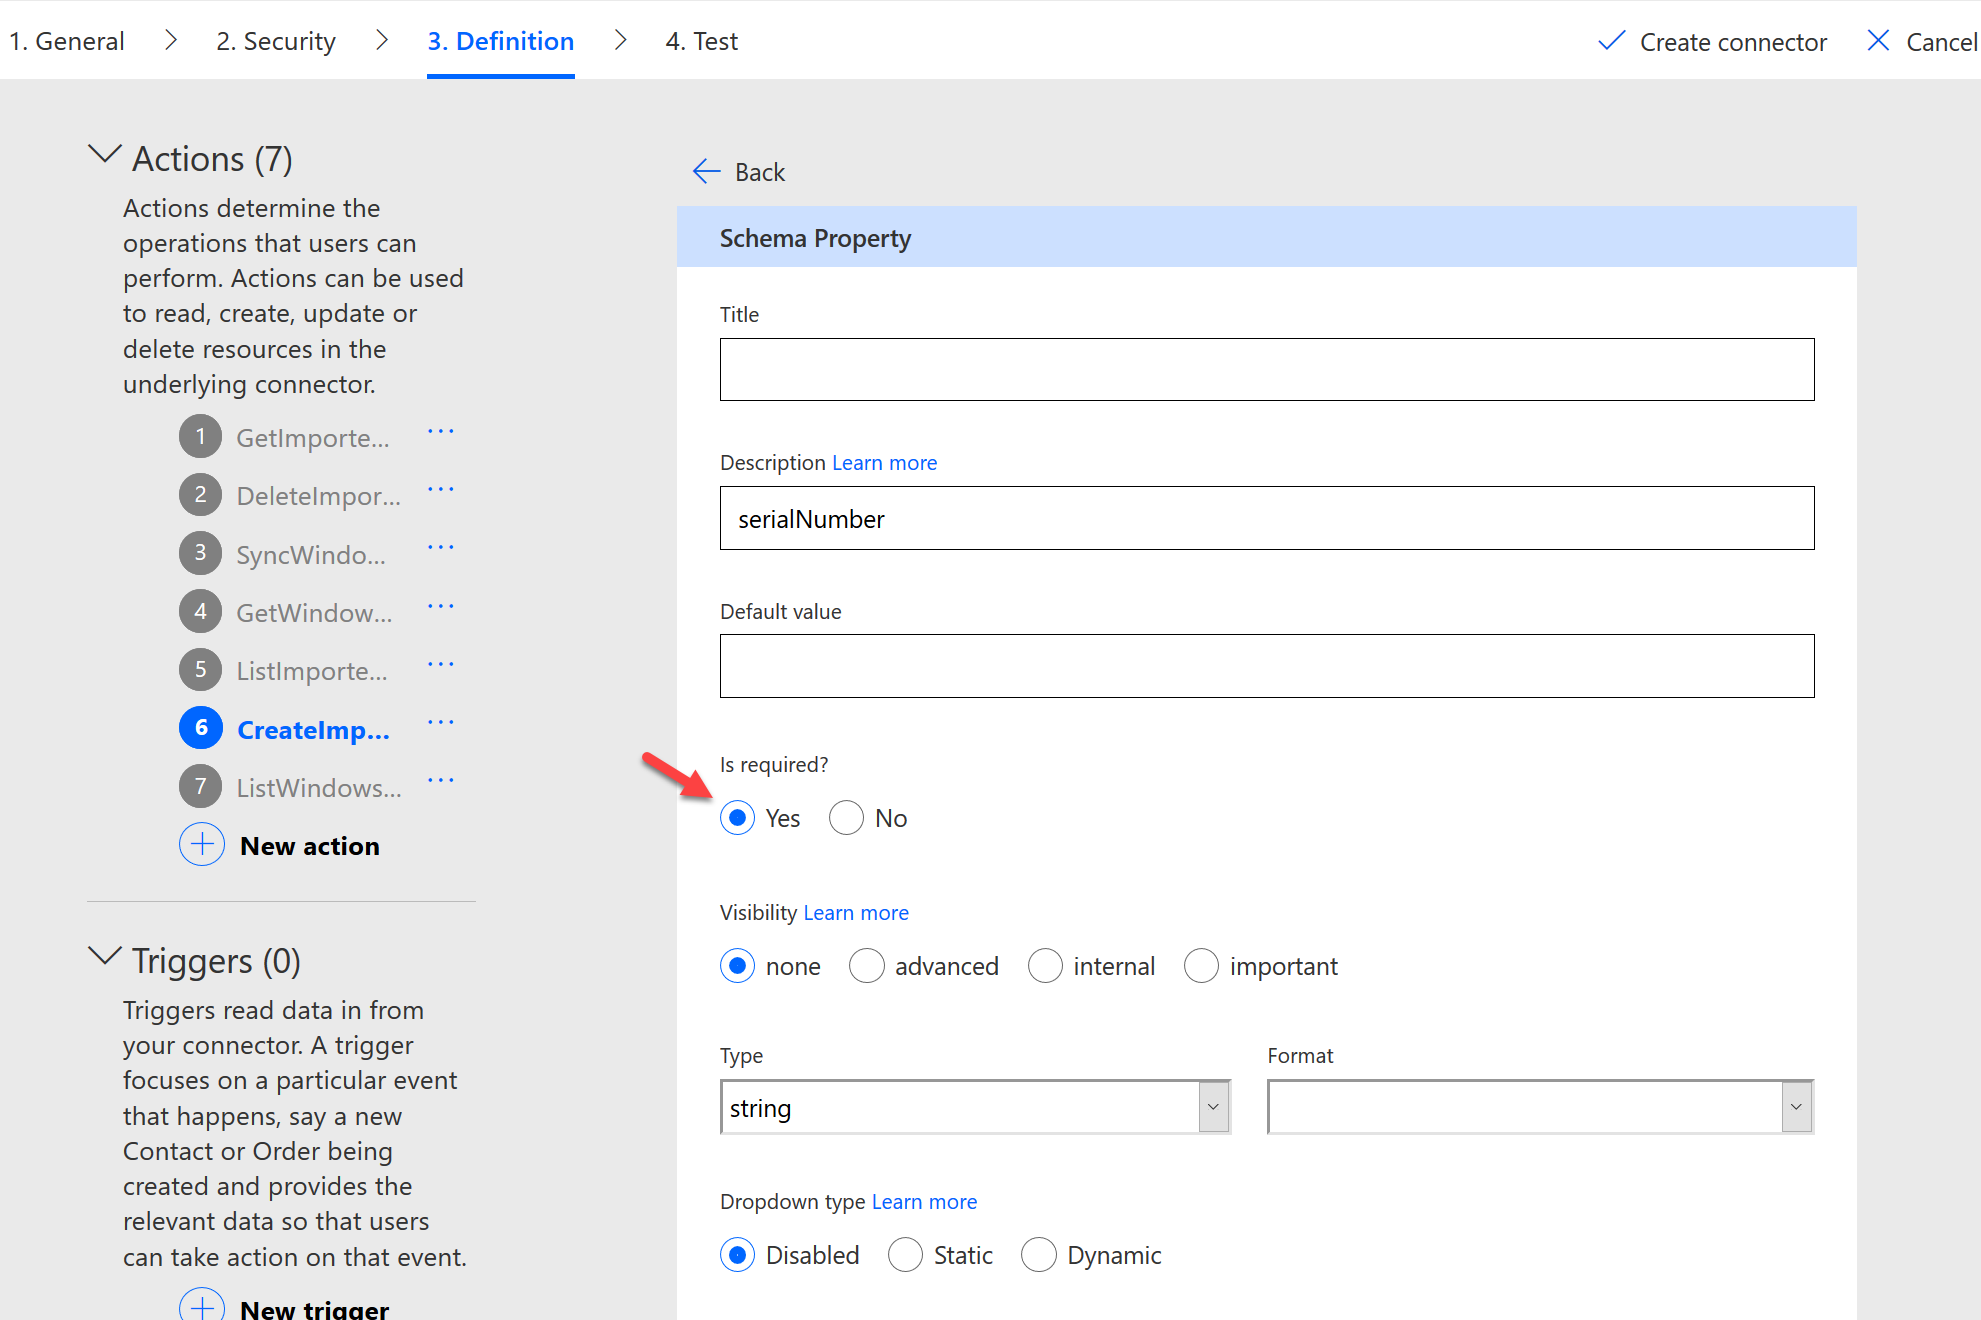
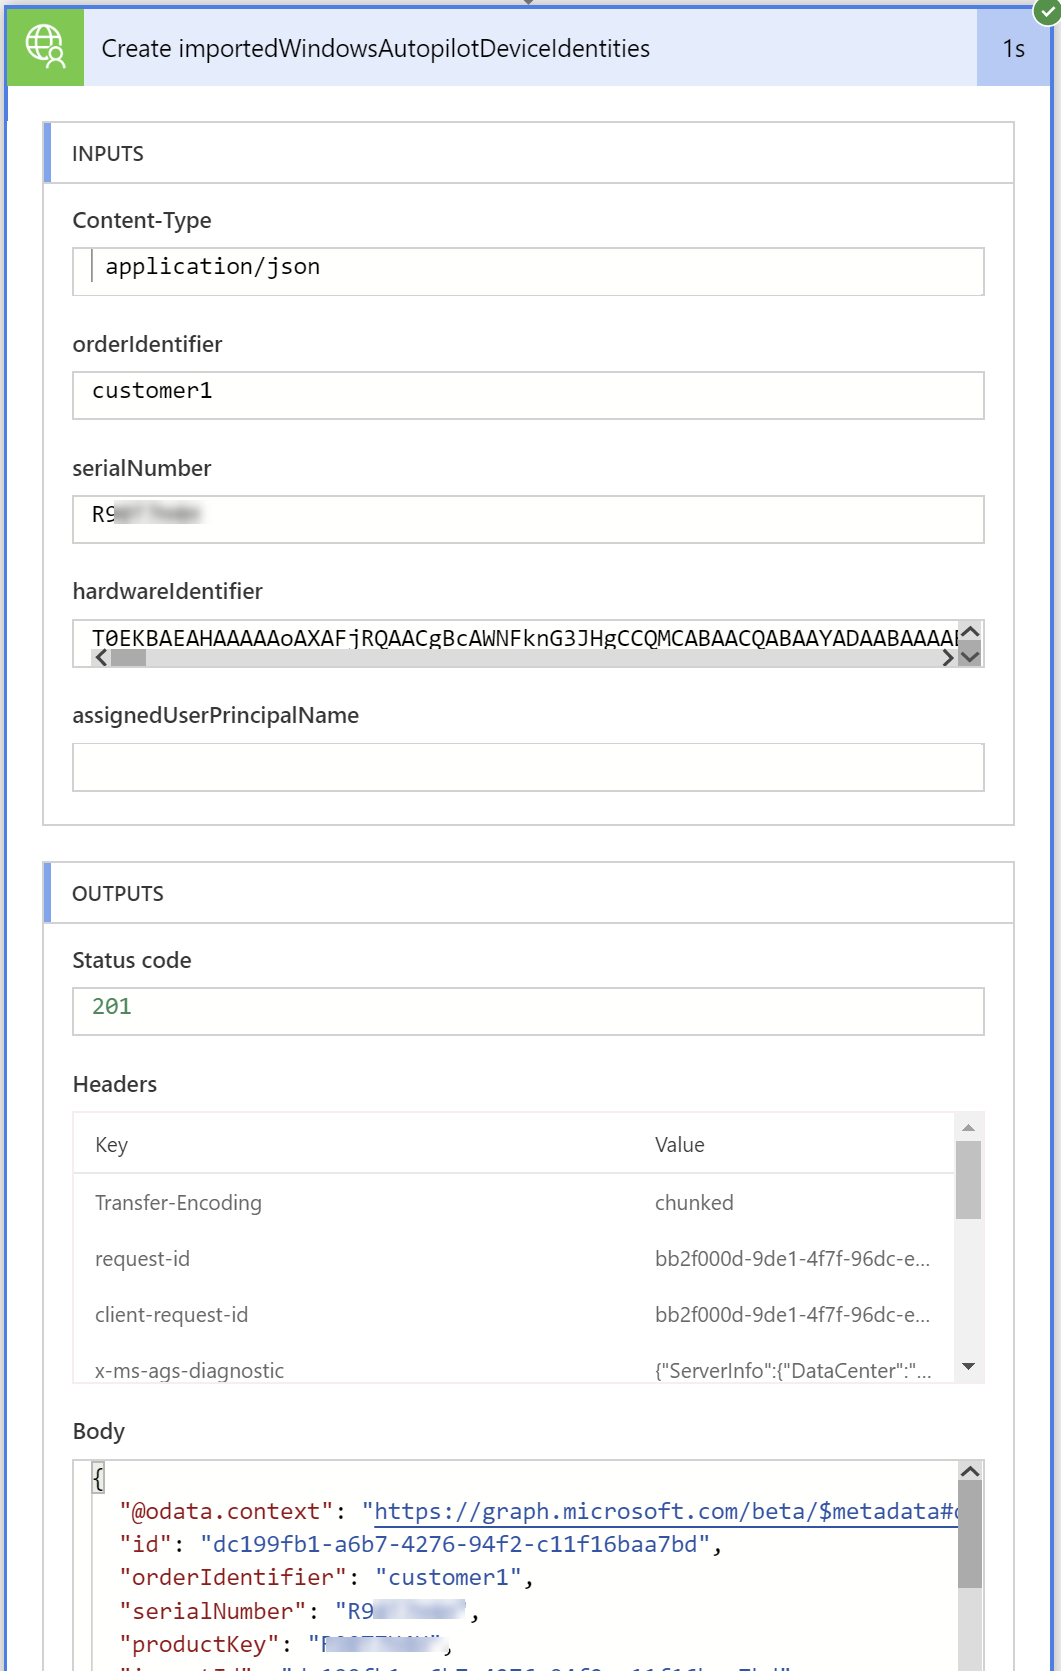
- After click on Definition, you should seeing this page. Do any nessesary changes as you wish. In this case, I want to modify CreateImportedwindowsautopilotdeviceidentities, because I want contents of “body” are configured as requried.

- After click on body, I configured hardwareIdentifier, orderIdentifier and serialNumber as required
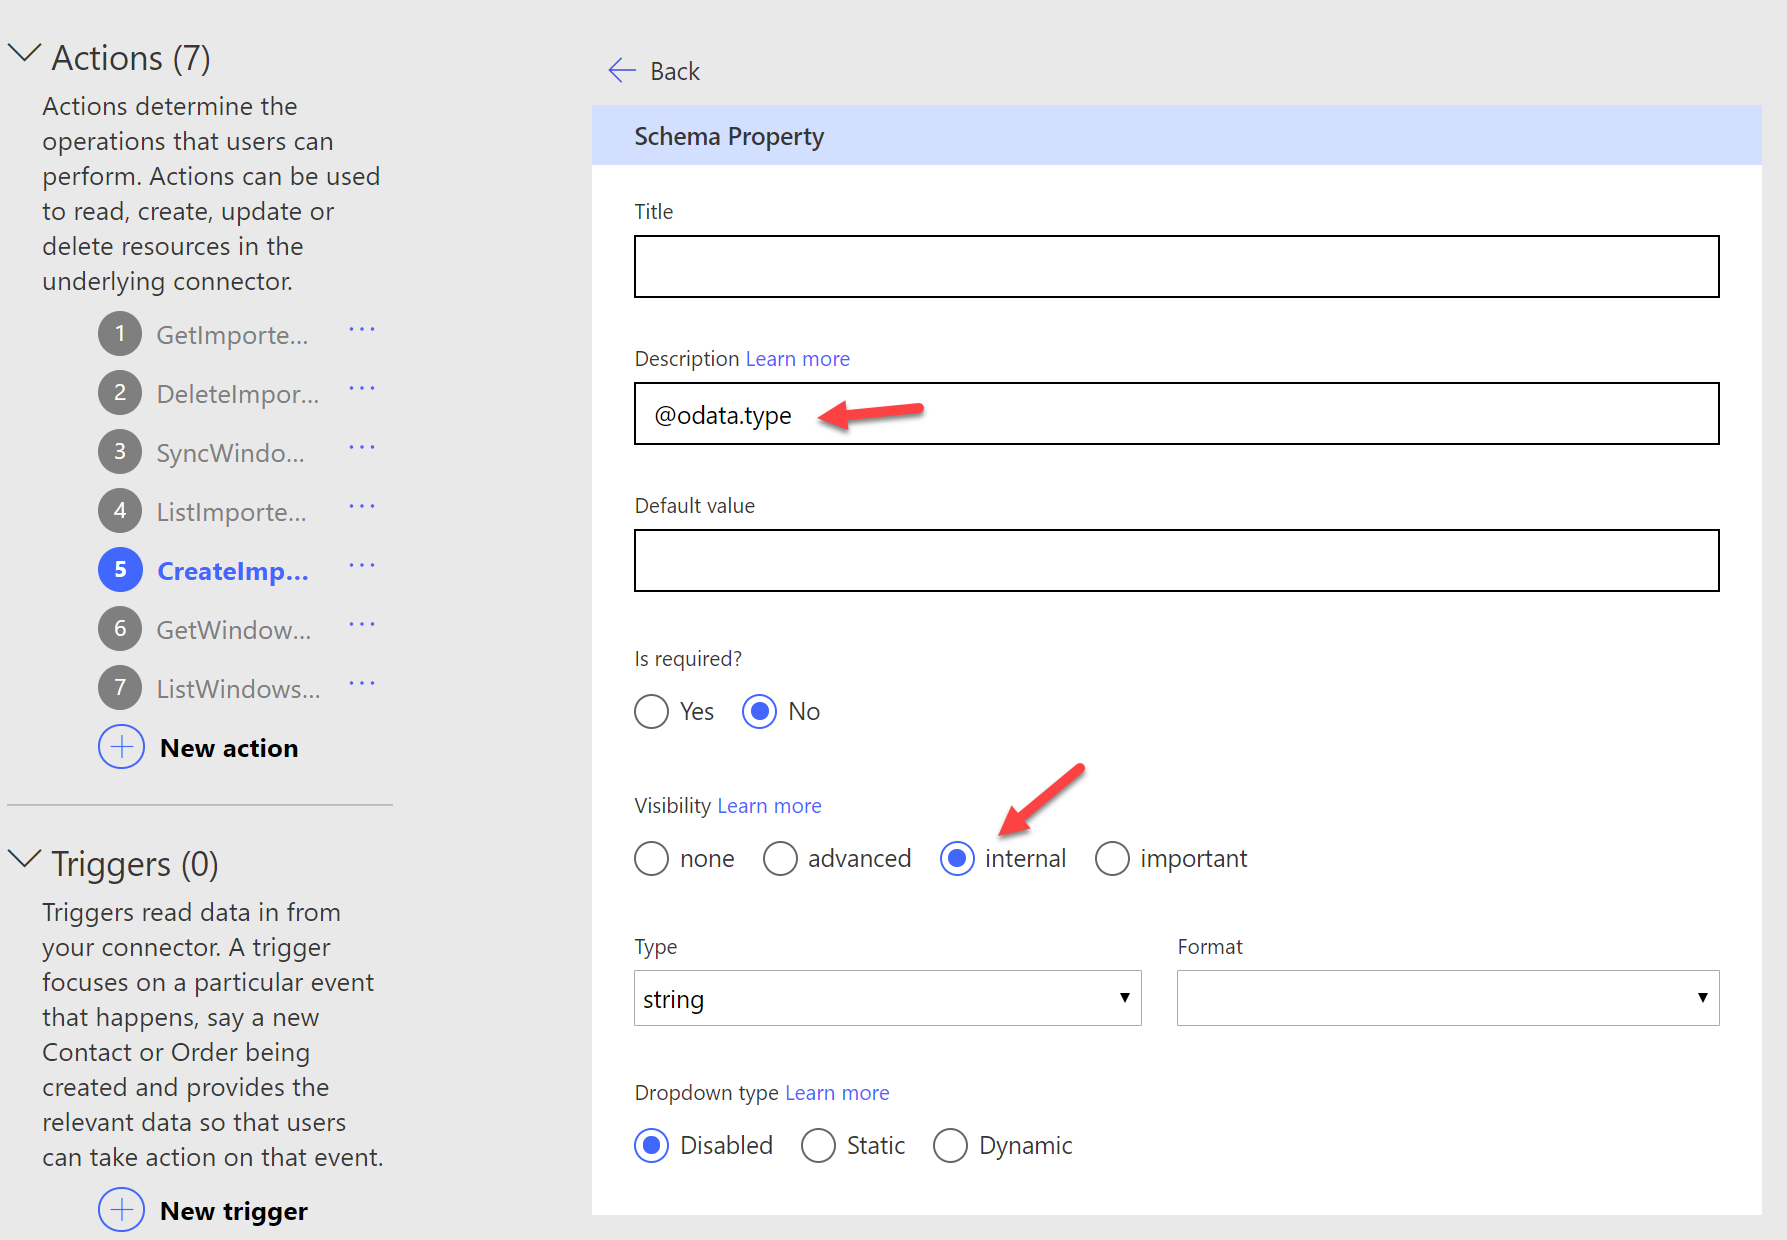
- Click on “Back“, and change @odata.type Visibility to internal, so that this property will be hidden from your flow
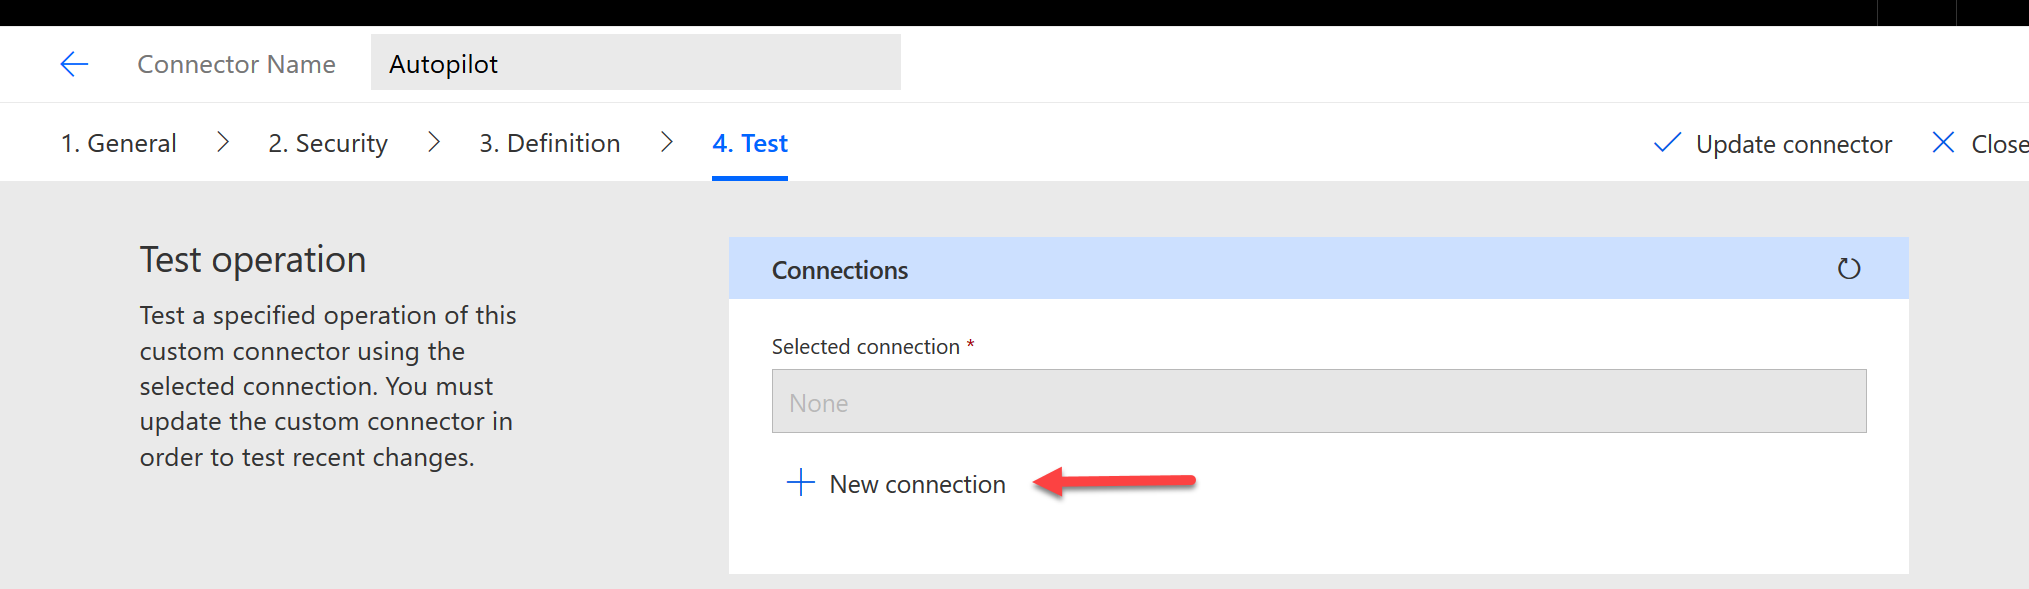
- After finished all the configurations, click on Create connector, then go to Test page
- Click on new connection, use a user account that has Import Autopilot permission what what we configured in earlier step Create a new Intune Role (RBAC) for Autopilot
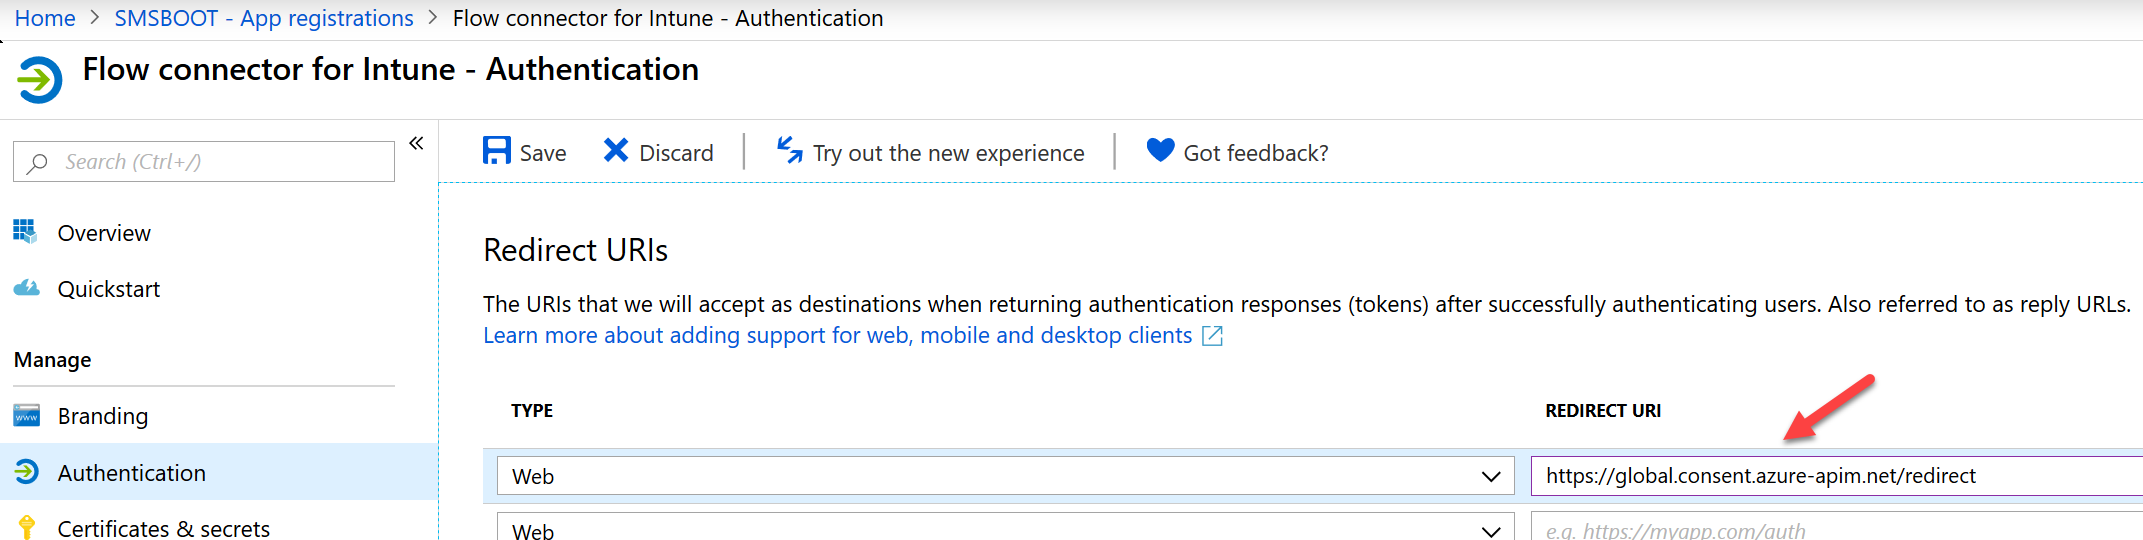
- You will properly see this error, telling you that there is no reply address is registered for the application, because we didn’t put any reply address when we created that Azure Application.
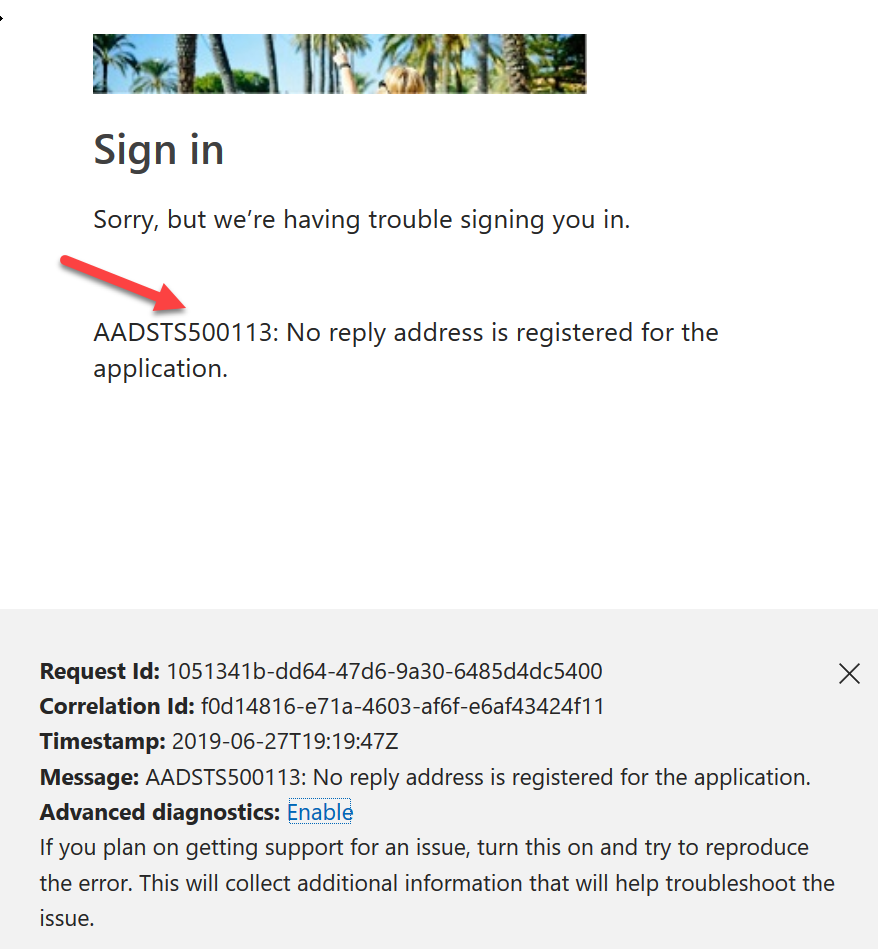
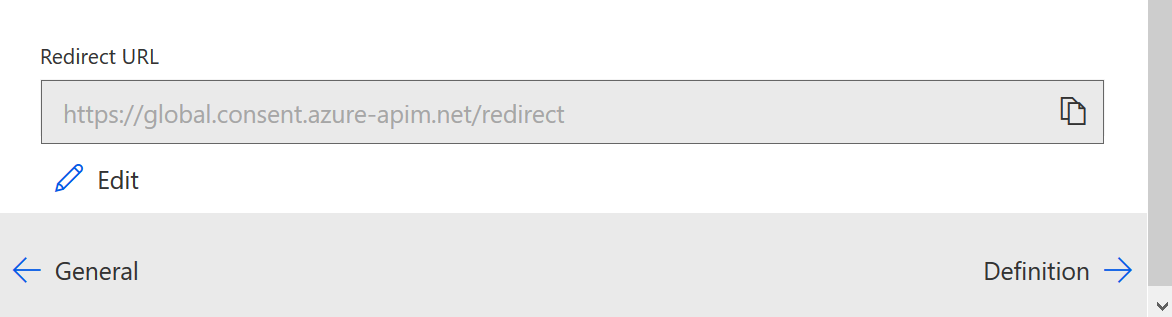
- Now we go back to the Security page, copy this Redirect URL and paste it back to the Azure application: Authentication – Redirect URL , remember Save the settings. 🙂
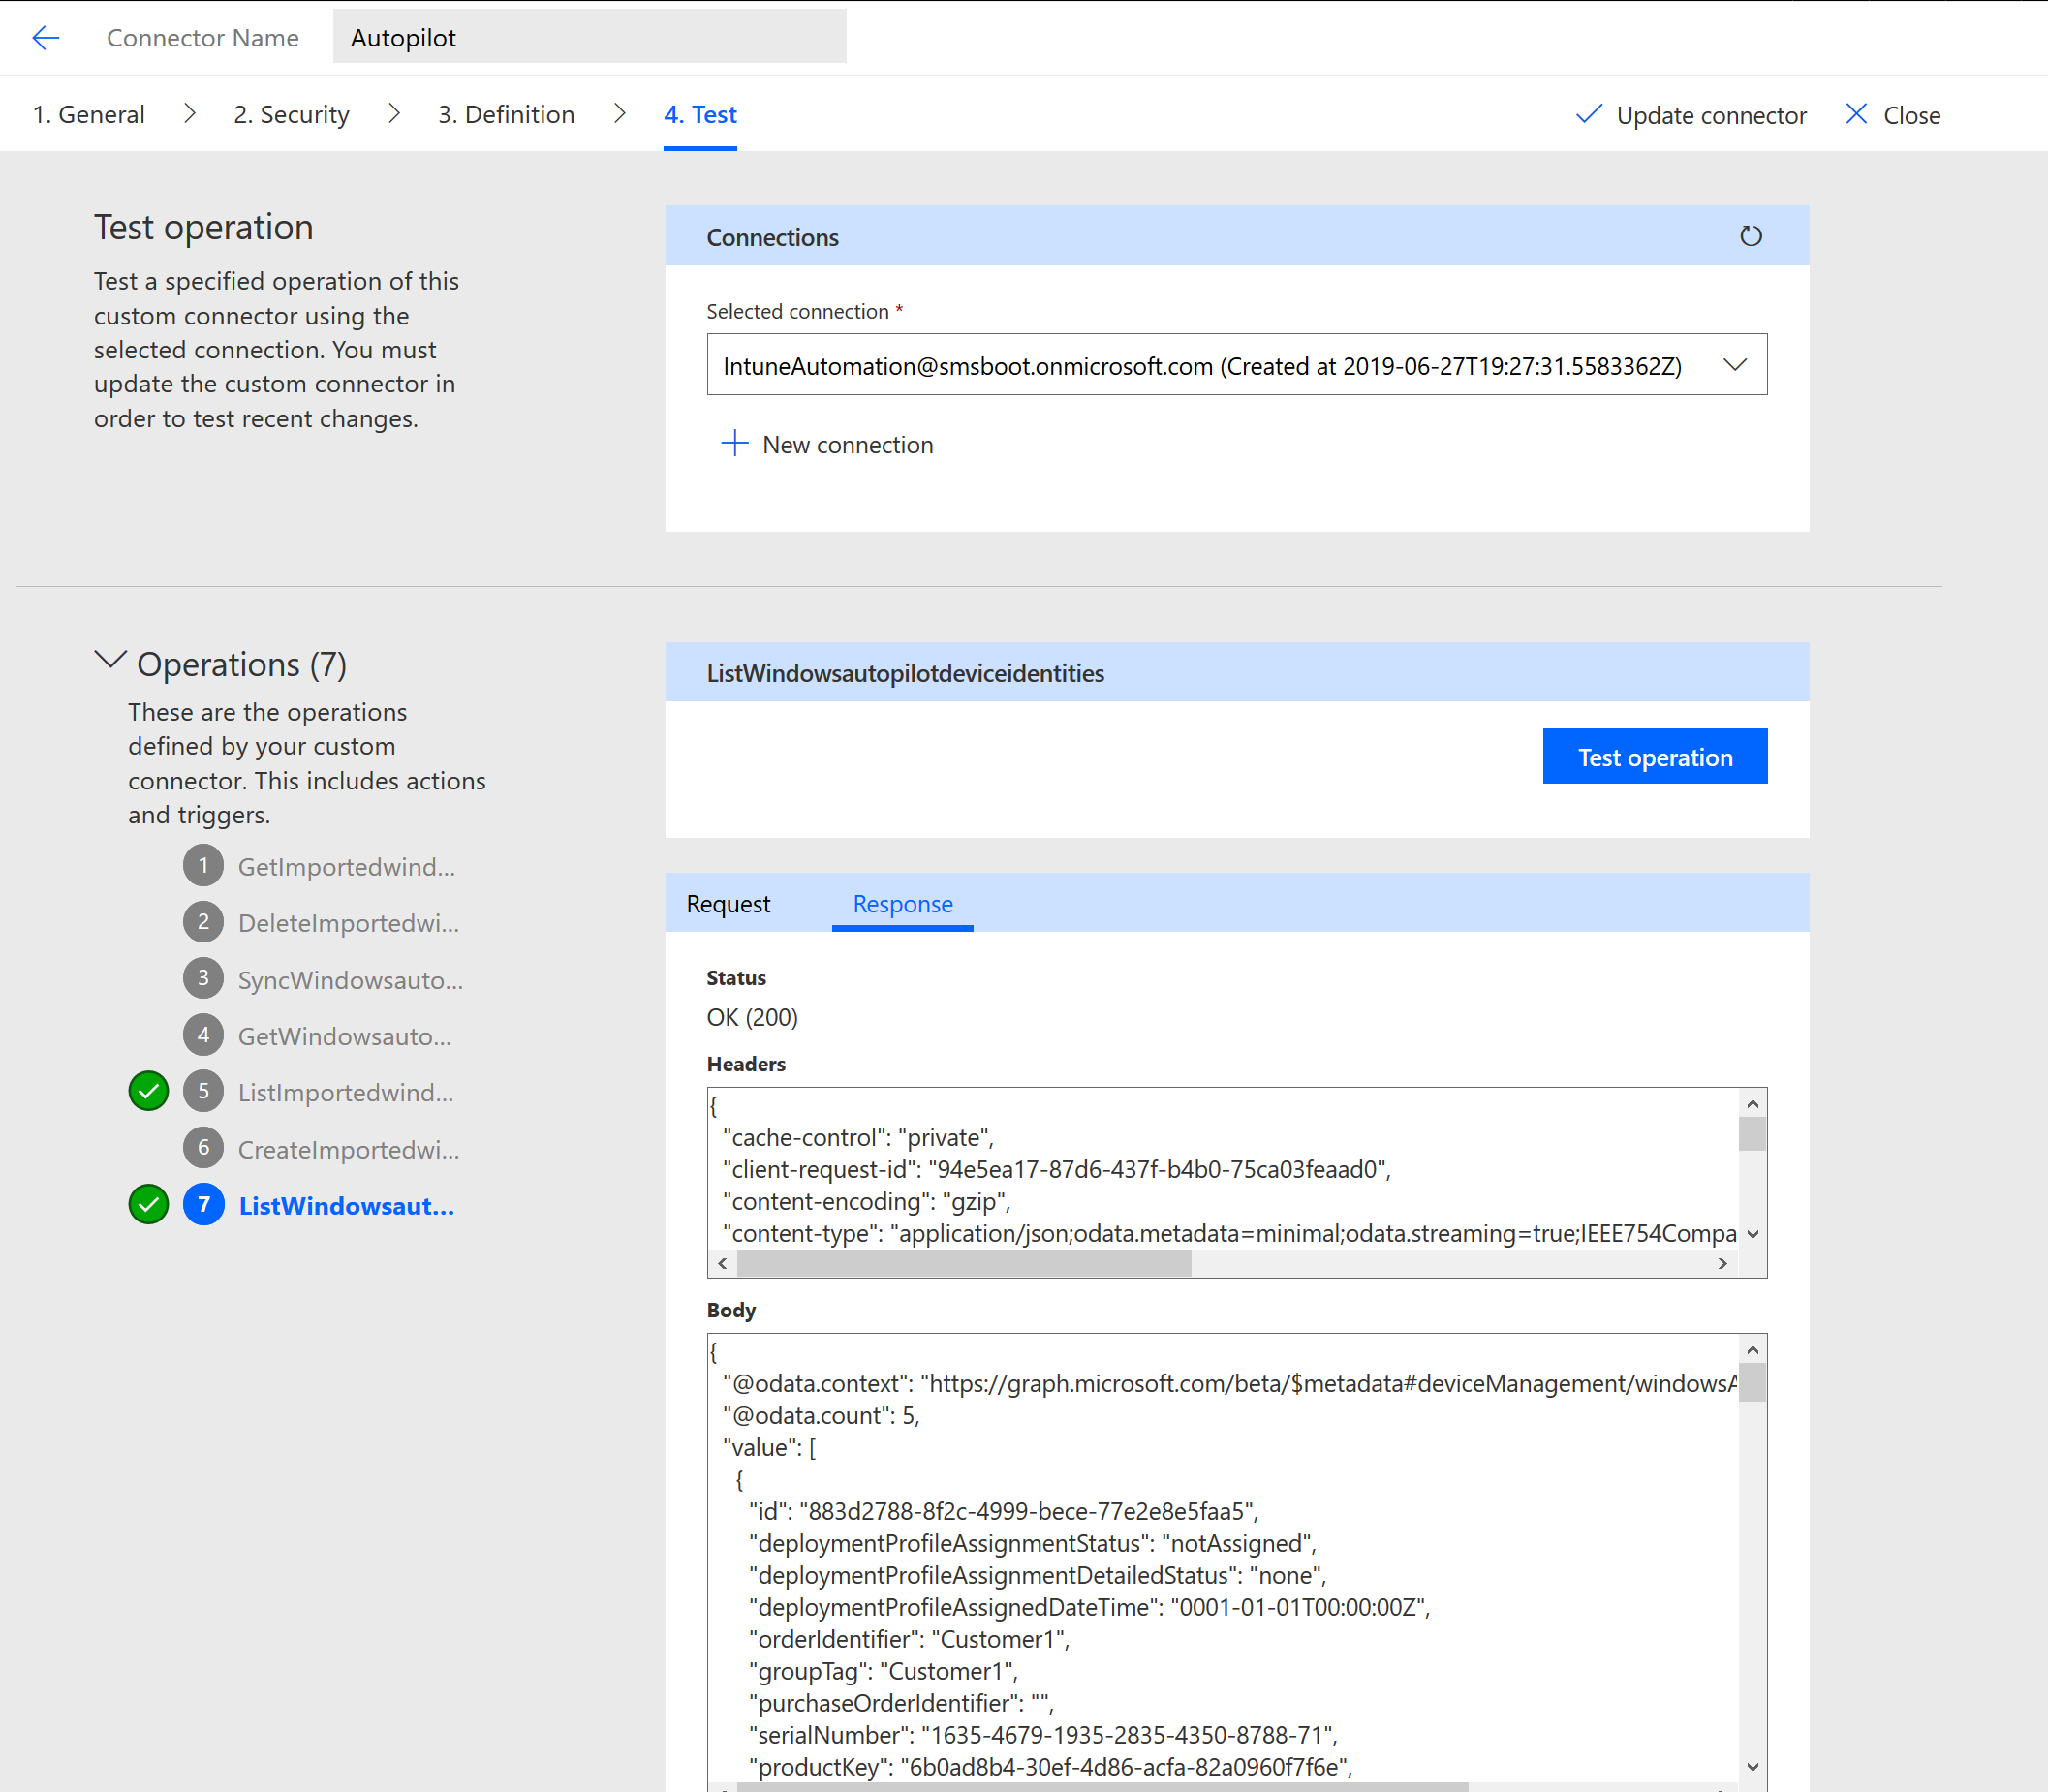
- If everything goes well (I hope so), you can run some test, example number 7: ListWindowsautopilotdeviceidentities, you should able to see all your imported Autopilot devices.
Create a new Flow
Note: If you don’t want skip all these steps, you can import my flow, download from my GitHub here, import steps can follow this post https://flow.microsoft.com/en-us/blog/import-export-bap-packages/
Here are the manual step how to create this flow
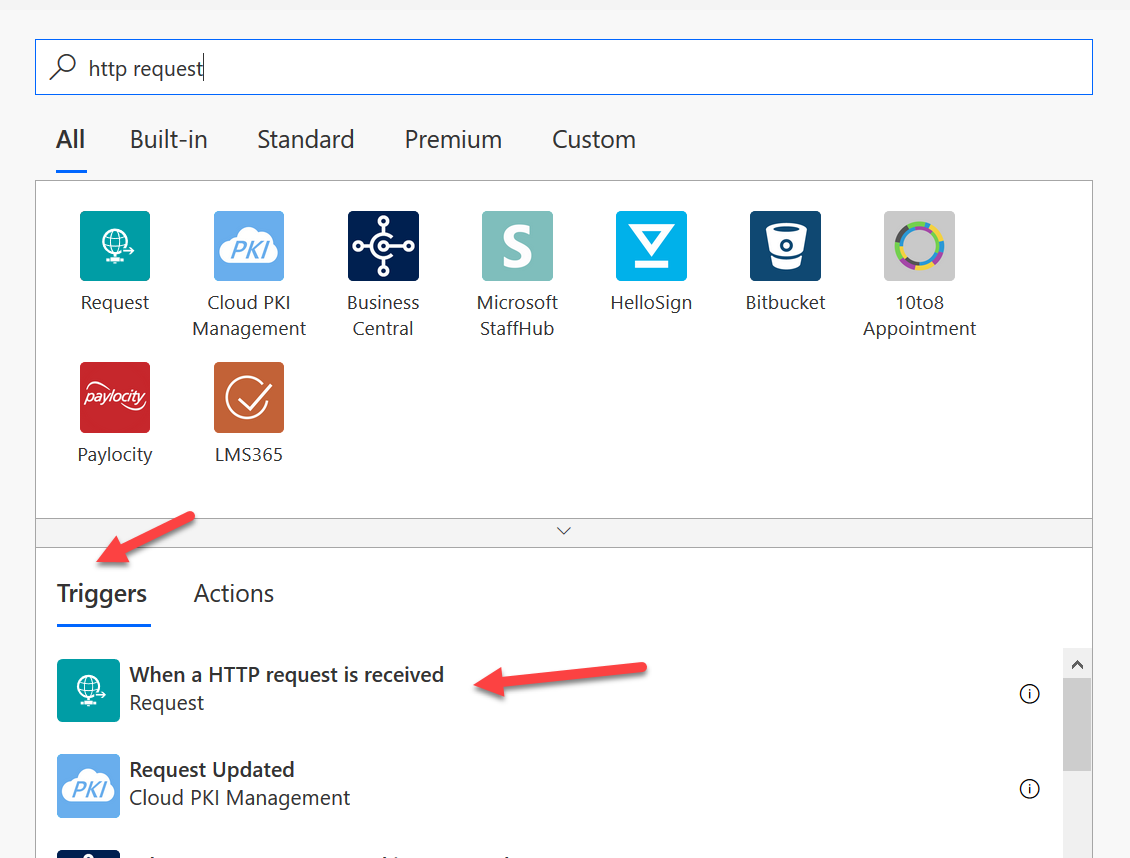
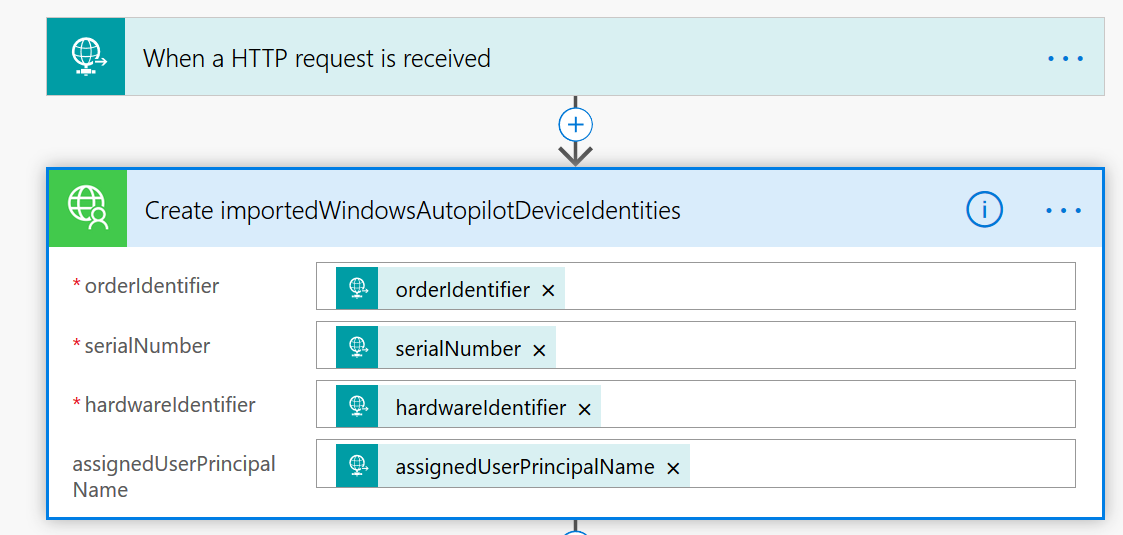
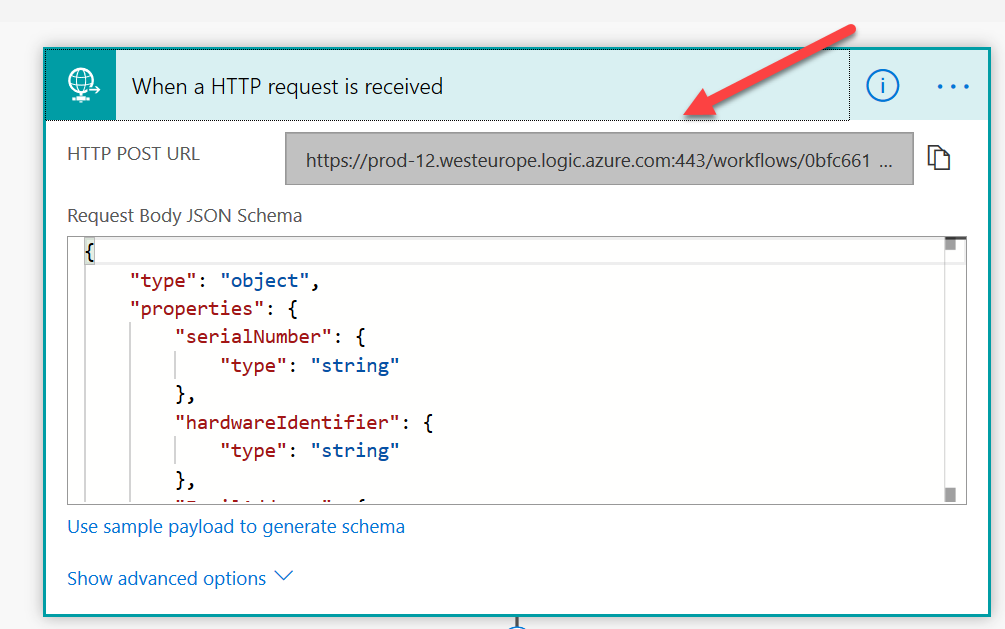
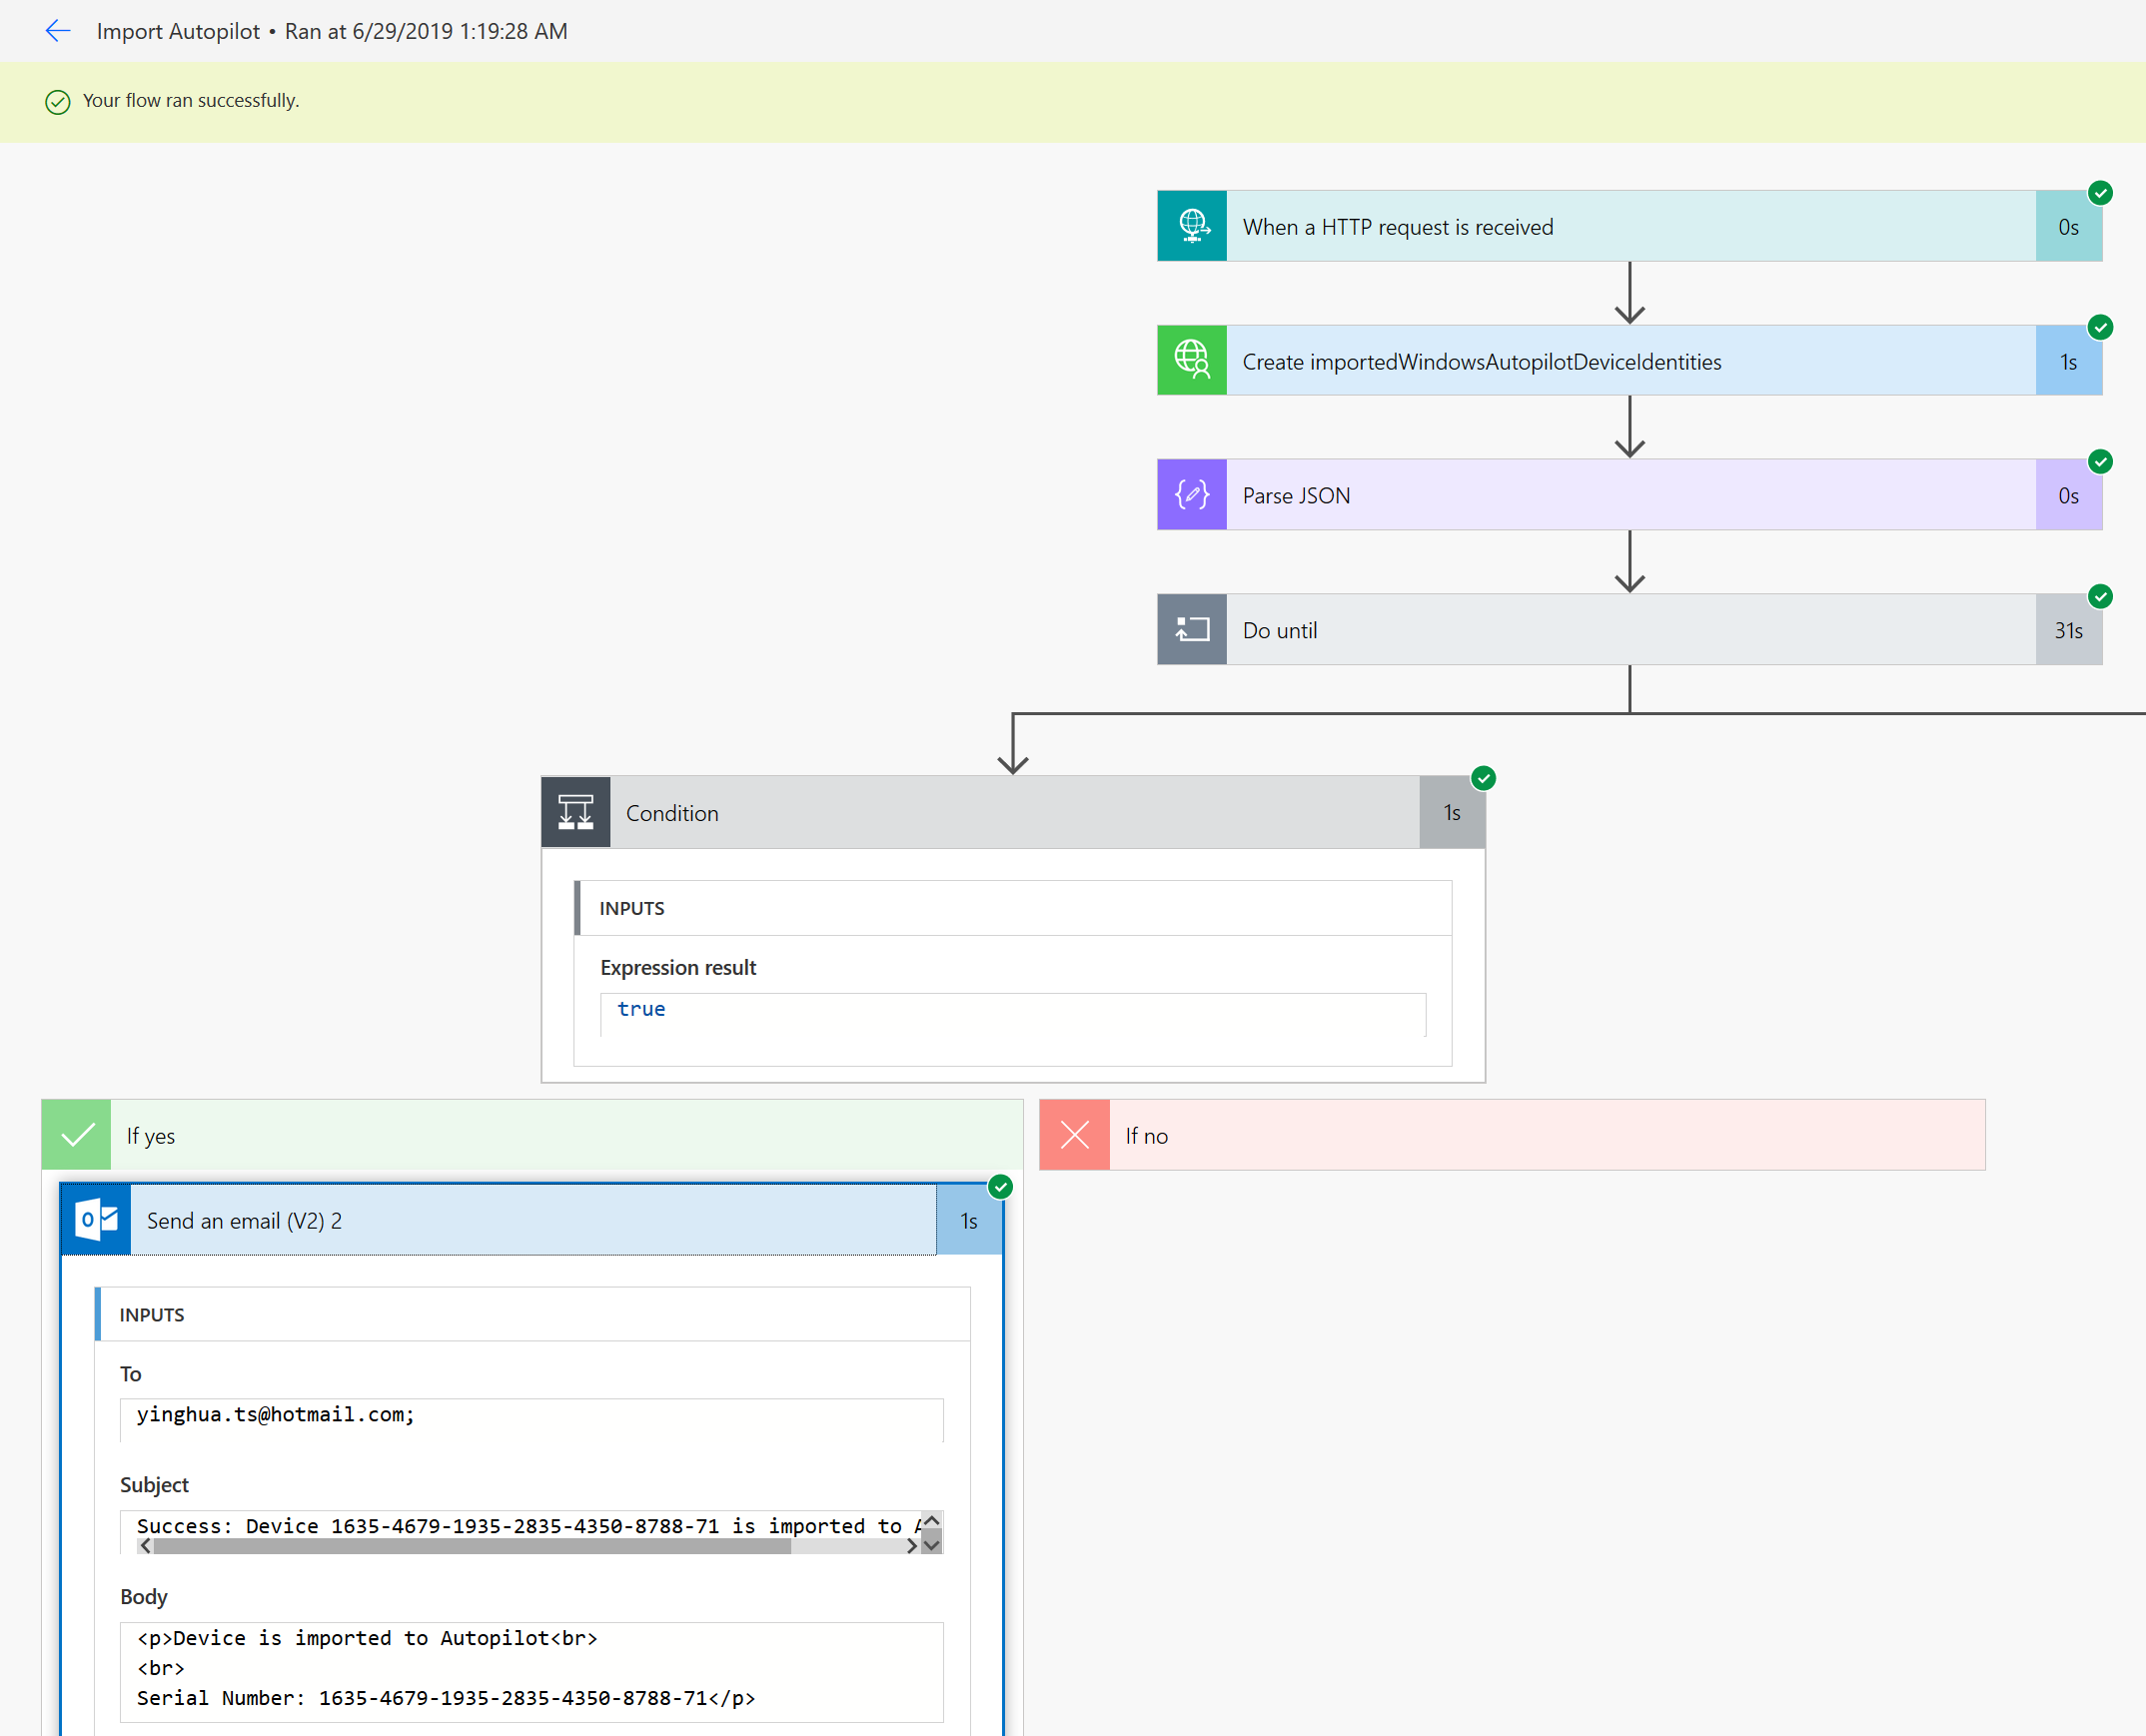
- Create a empty flow without any template. Use the first trigger step using “When a HTTP request is received”
- Copy and paste this JSON code to “Request Body JSON Schema. This is actually the result of the PowerShell script that we will run locally on those machines.
You properly noticed HTTP POST URL is still empty, but it will generate the url after you save your flow{ "type": "object", "properties": { "serialNumber": { "type": "string" }, "hardwareIdentifier": { "type": "string" }, "EmailAddress": { "type": "string" }, "assignedUserPrincipalName": { "type": "string" }, "orderIdentifier": { "type": "string" } } }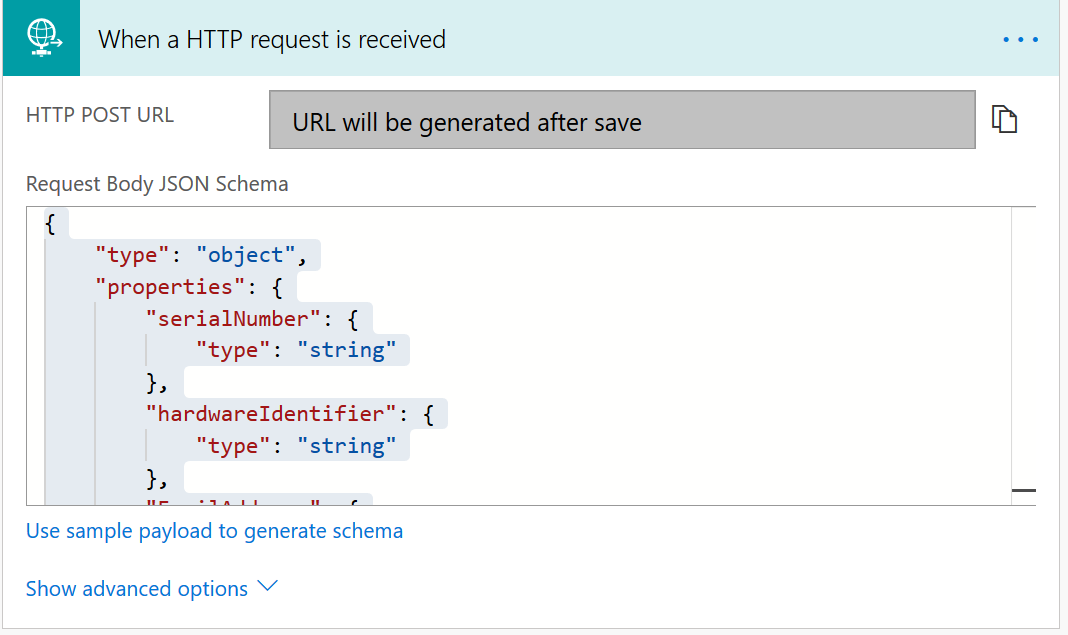
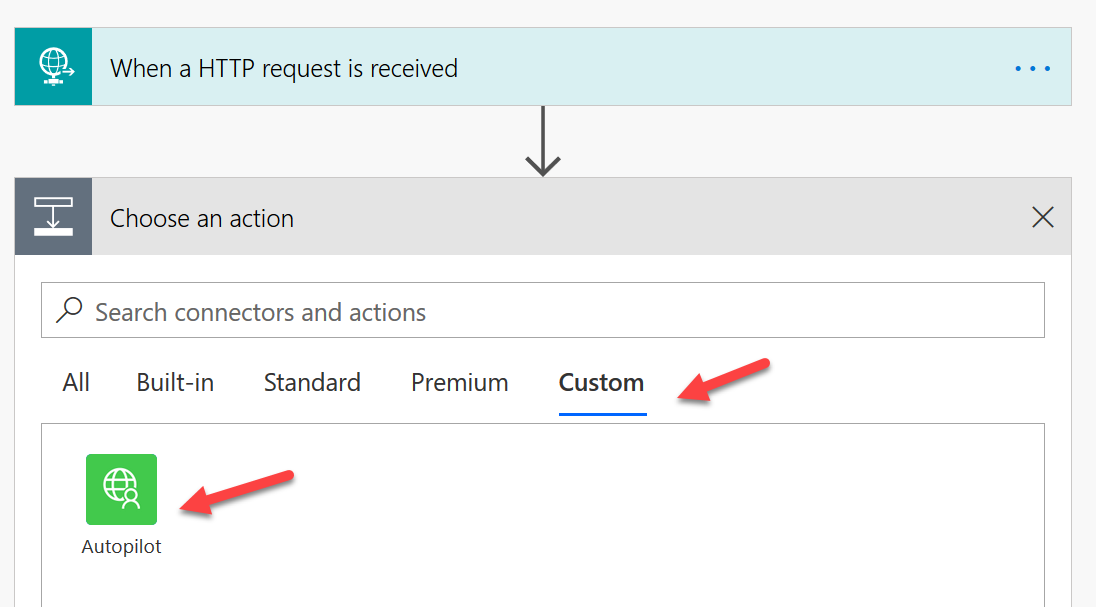
- Click on Custom, here we will see all our custom connectors. Choose the custom connector that you created for Autopilot
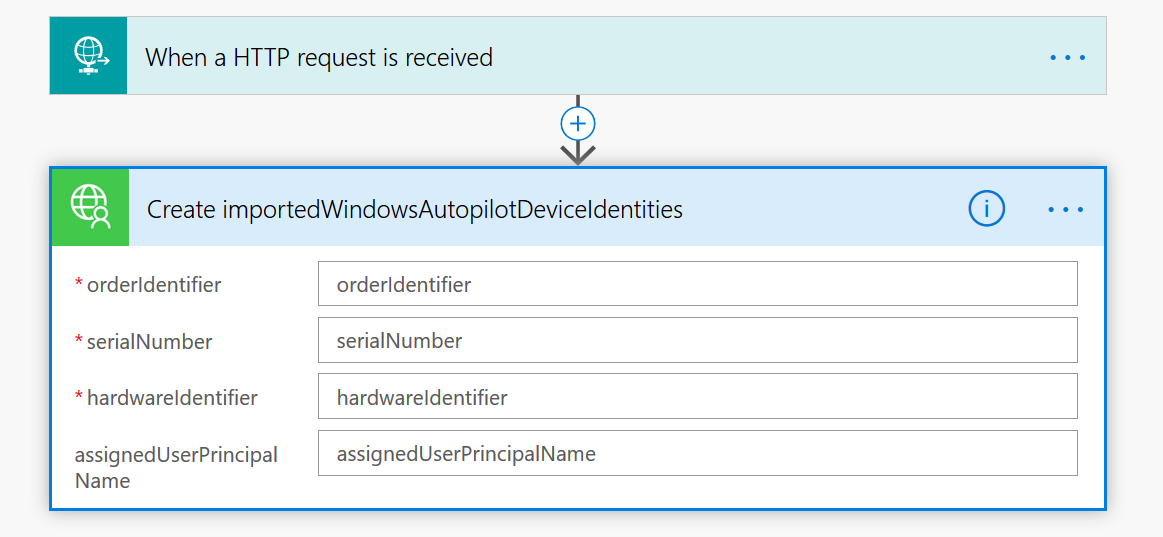
- Choose Create importedWindowsAutopilotDeviceIdentities, you should see something like this.
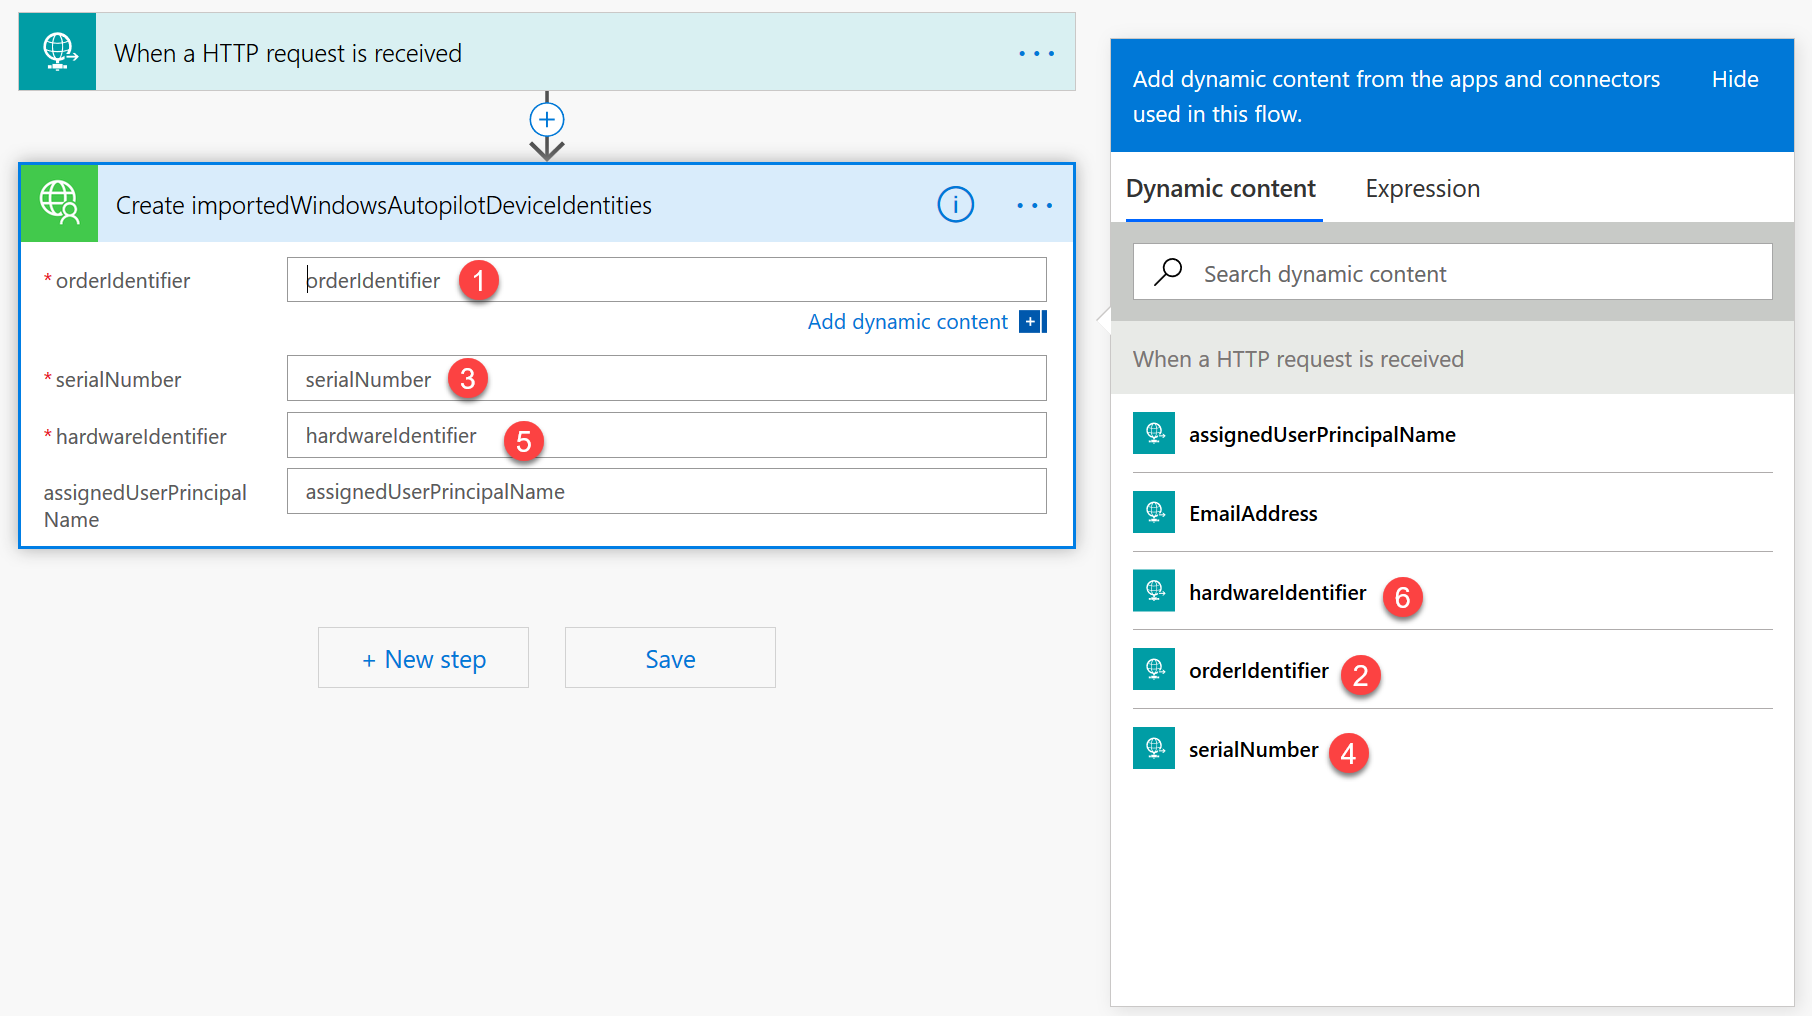
- Choose the correct HTTP request value for those properties
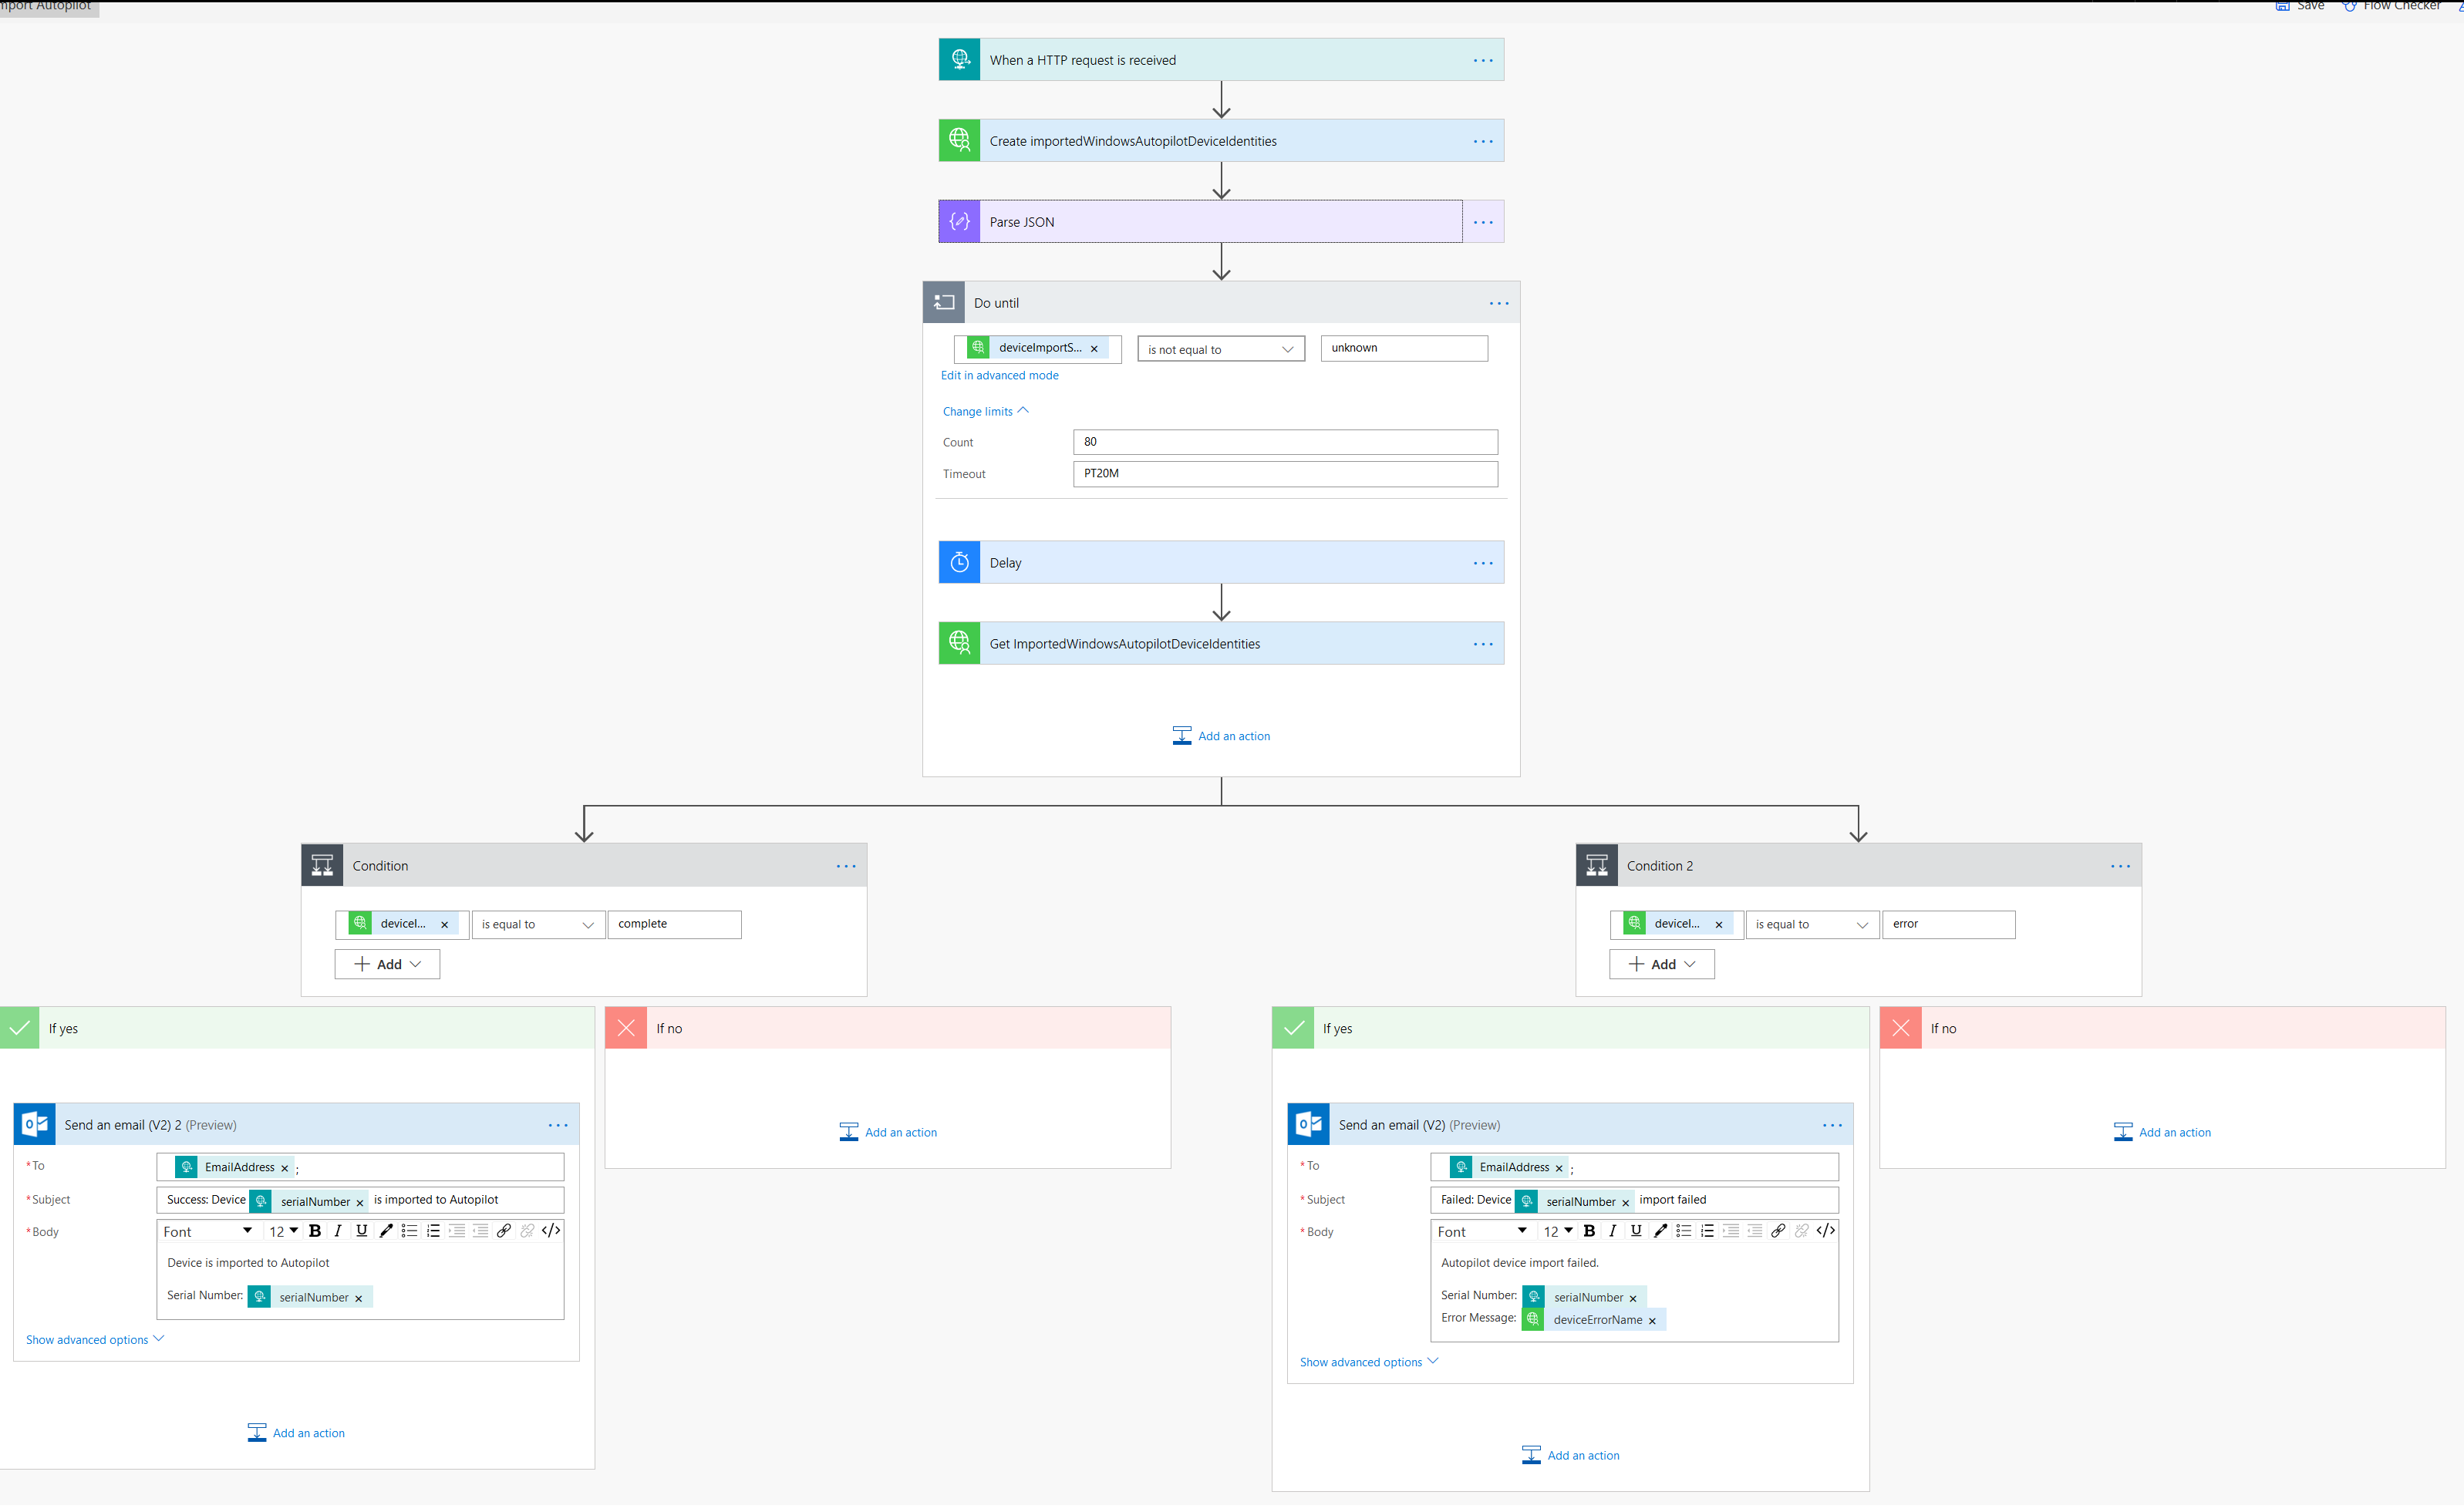
- Add Parse JSON action, so that we will get correct JSON date that we want.

{ "type": "object", "properties": { "@@odata.context": { "type": "string" }, "id": { "type": "string" }, "orderIdentifier": { "type": "string" }, "serialNumber": { "type": "string" }, "productKey": { "type": "string" }, "importId": { "type": "string" }, "hardwareIdentifier": { "type": "string" }, "assignedUserPrincipalName": { "type": "string" }, "state": { "type": "object", "properties": { "deviceImportStatus": { "type": "string" }, "deviceRegistrationId": { "type": "string" }, "deviceErrorCode": { "type": "integer" }, "deviceErrorName": { "type": "string" } } } } } - Add Do until condition, because we need to check if the import progress is complete, we want to relatedly check the import status. Don’t input any settings yet.
- Inside the Do until, add a Delay action for 15 seconds
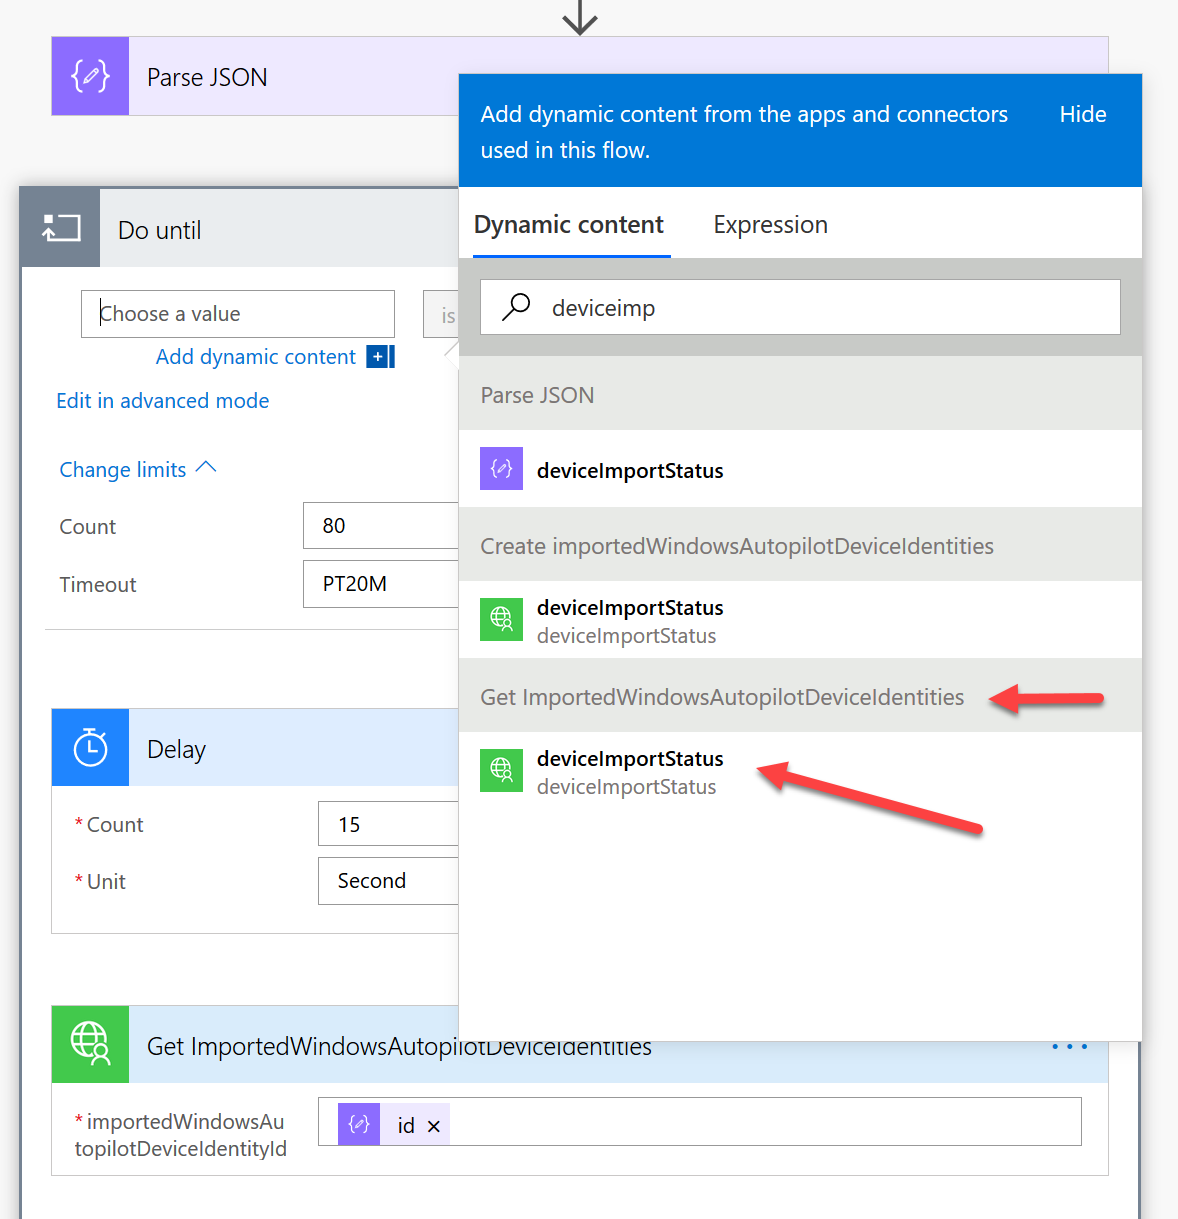
- Then we add an action to get device import status. Add Get ImportedWindowsAtuopilotDeviceIdentities action from our Autopilot custom connector, choose id from Parse JSON flow
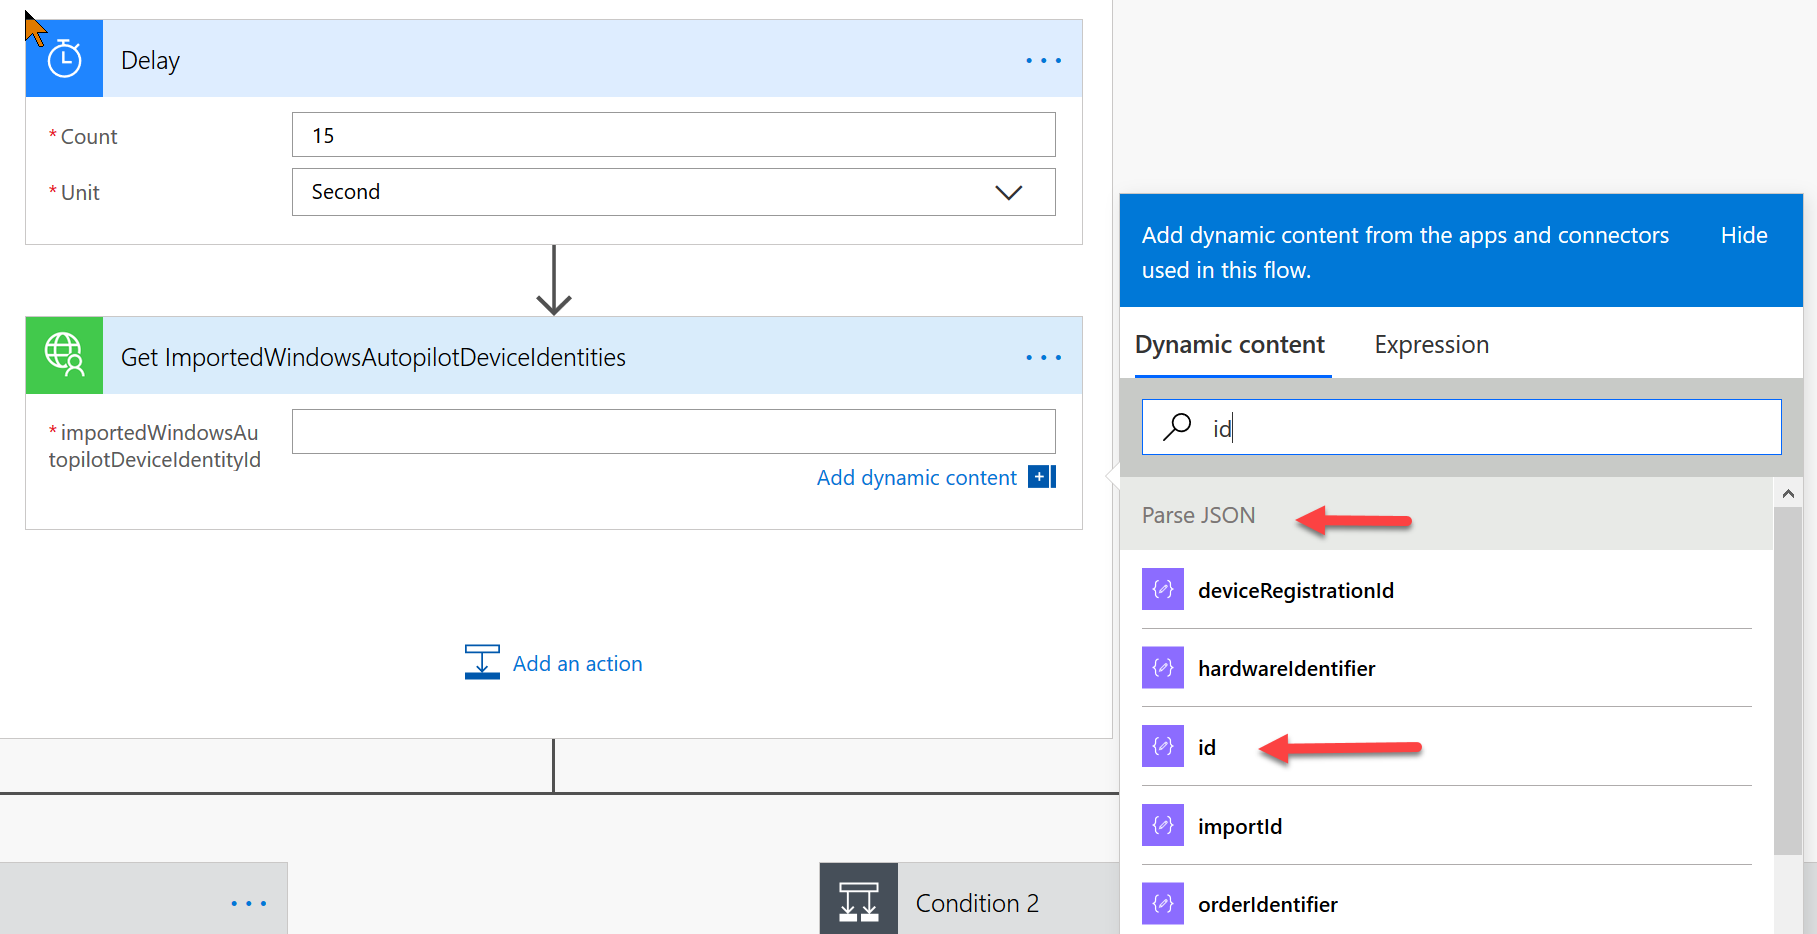
- Now we go back to Do until, choose value deviceImportStatus from Get ImportedWindowsAutopilotDeviceIdentities
- Configure Do until device import status is not equal to unknown. Count 80, Timeout PT20M.
This will check device import status every 15 seconds until status is not unknown. It will do that maximum 80 times in 20 minutes.
- After this, add Condition, configure if deviceImportStatus is equal to complete, then send an email.
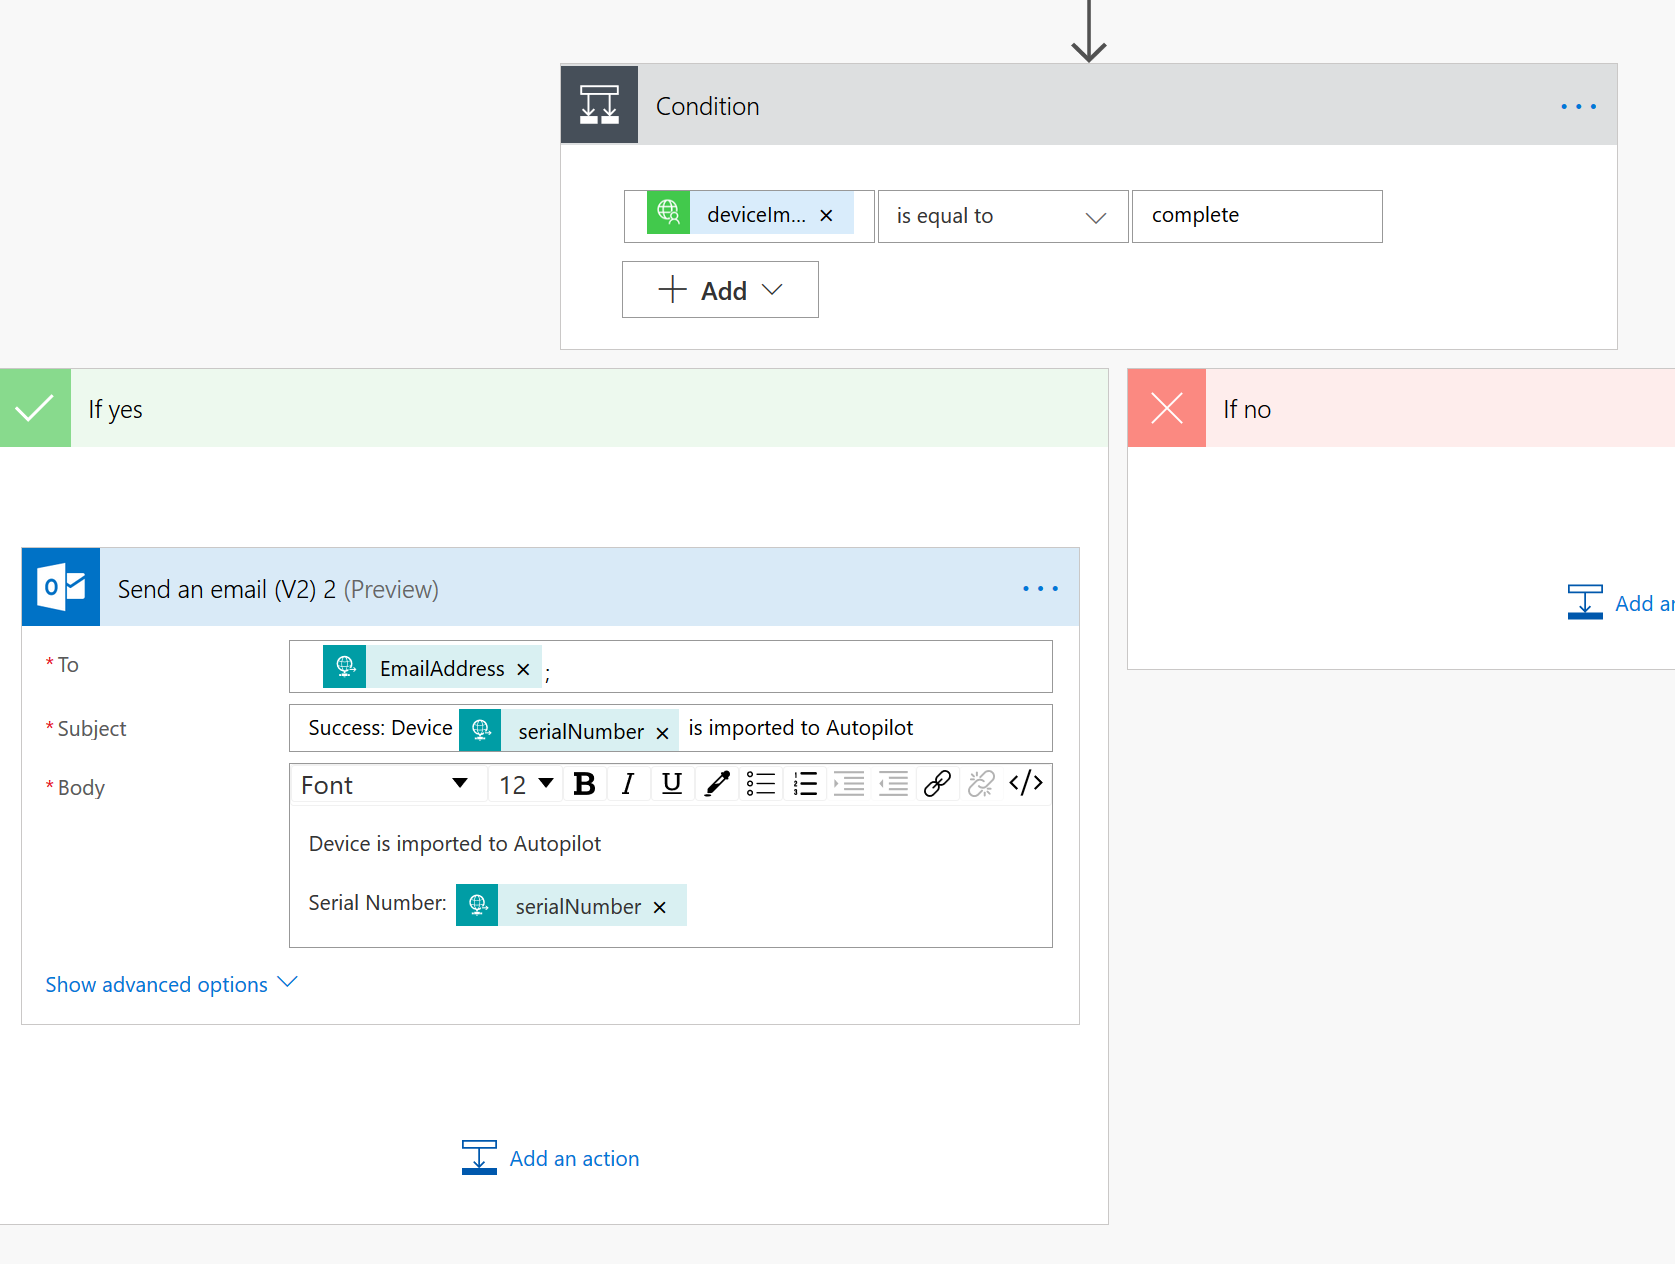
- You can also add a parallel branch step, if deviceImportStatus is equal to error, then send an email.
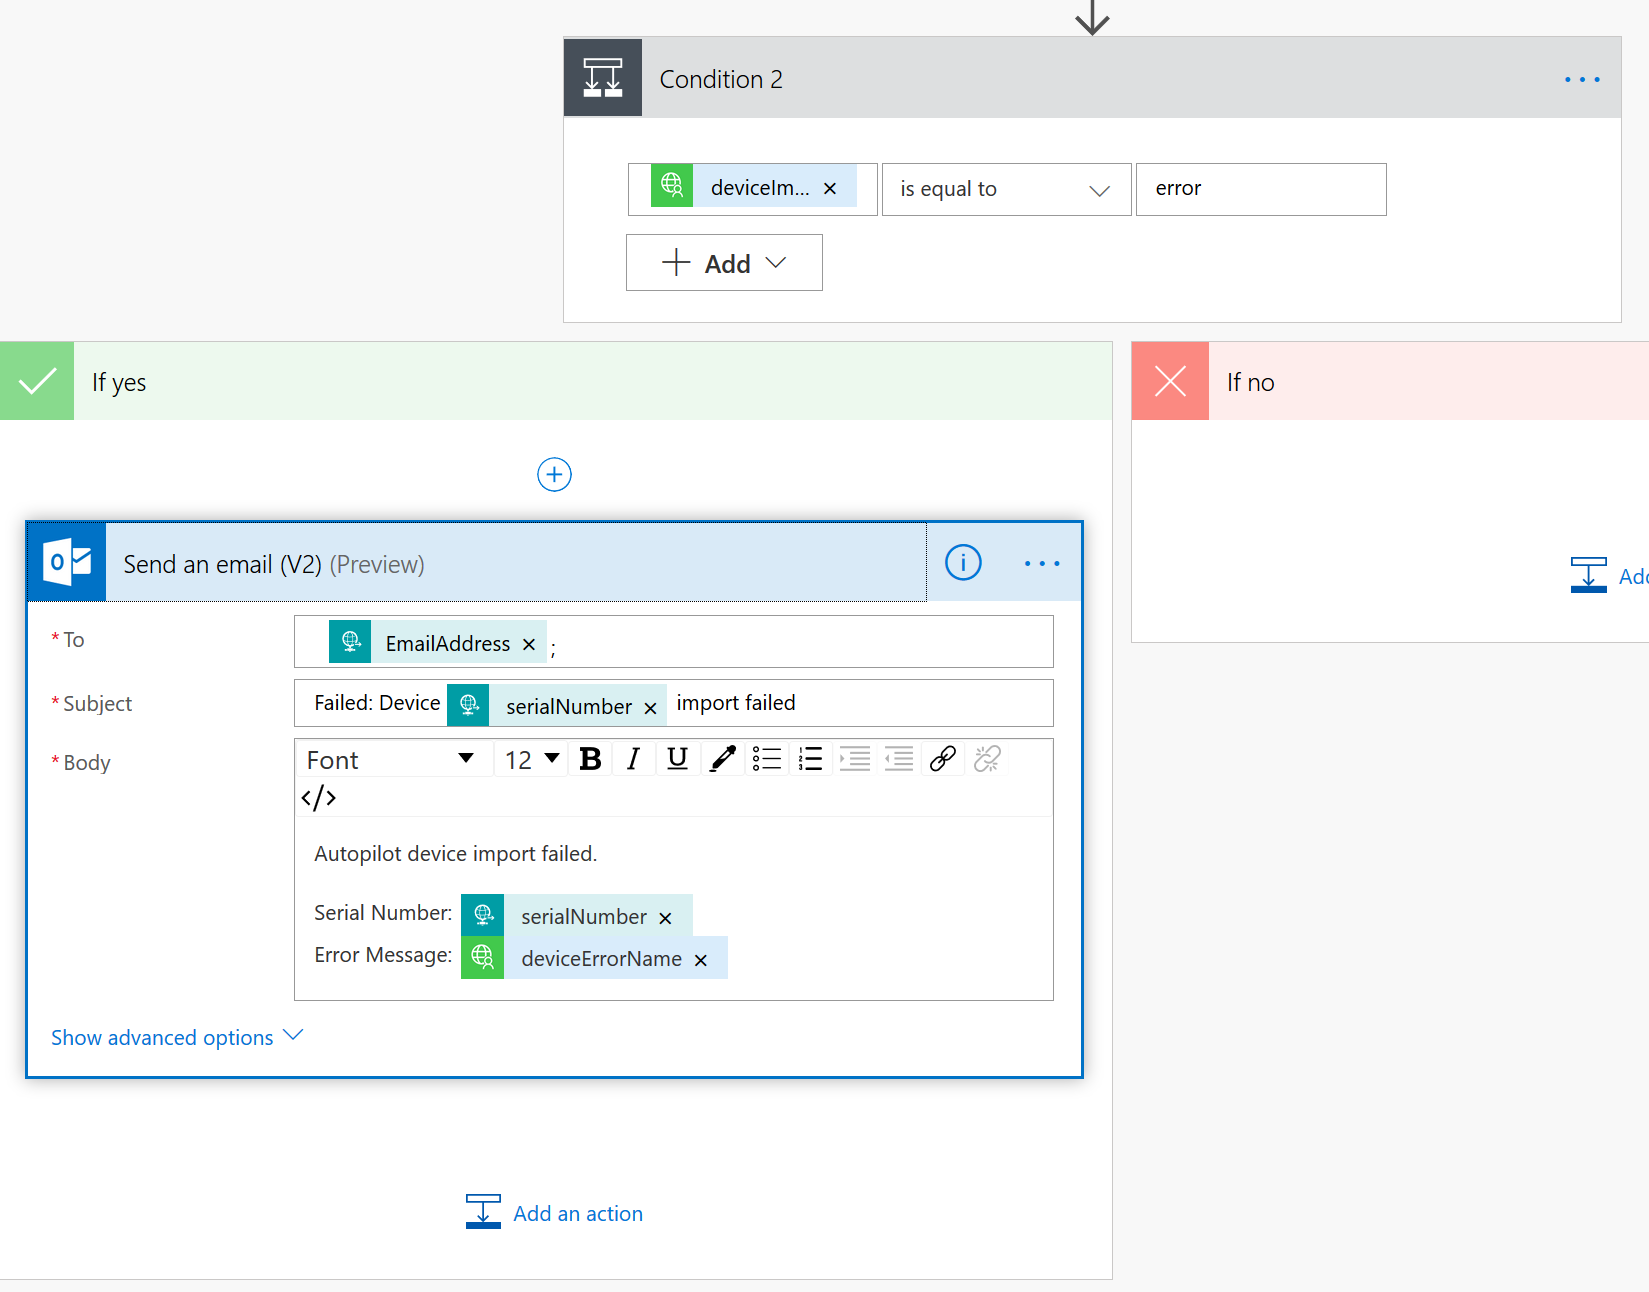
- This is how it look in the end
- Now click on Save, so that we save our flow, and you will get the unique HTTP Post url. Copy this URL, we will need that for our PowerShell script
PowerShell script
Here is the PowerShell script we use for run locally in those devices, change variable $Url value to the HTTP POST url we just copied.
Check the results
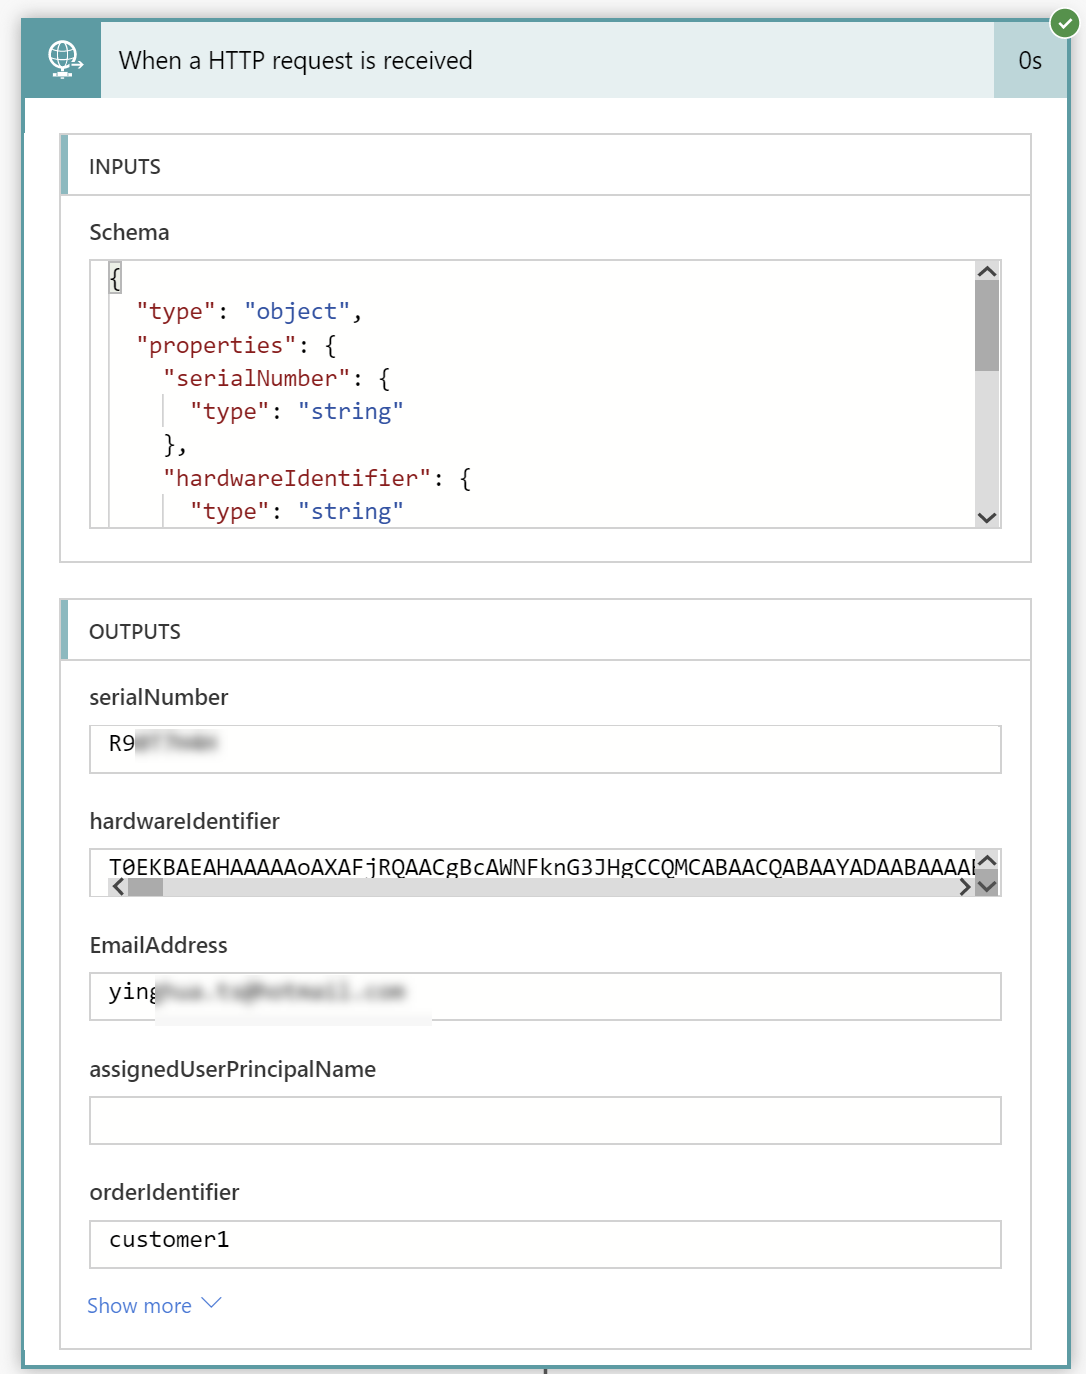
After script is run, check your Import Autopilot flow, you should able to see the results.
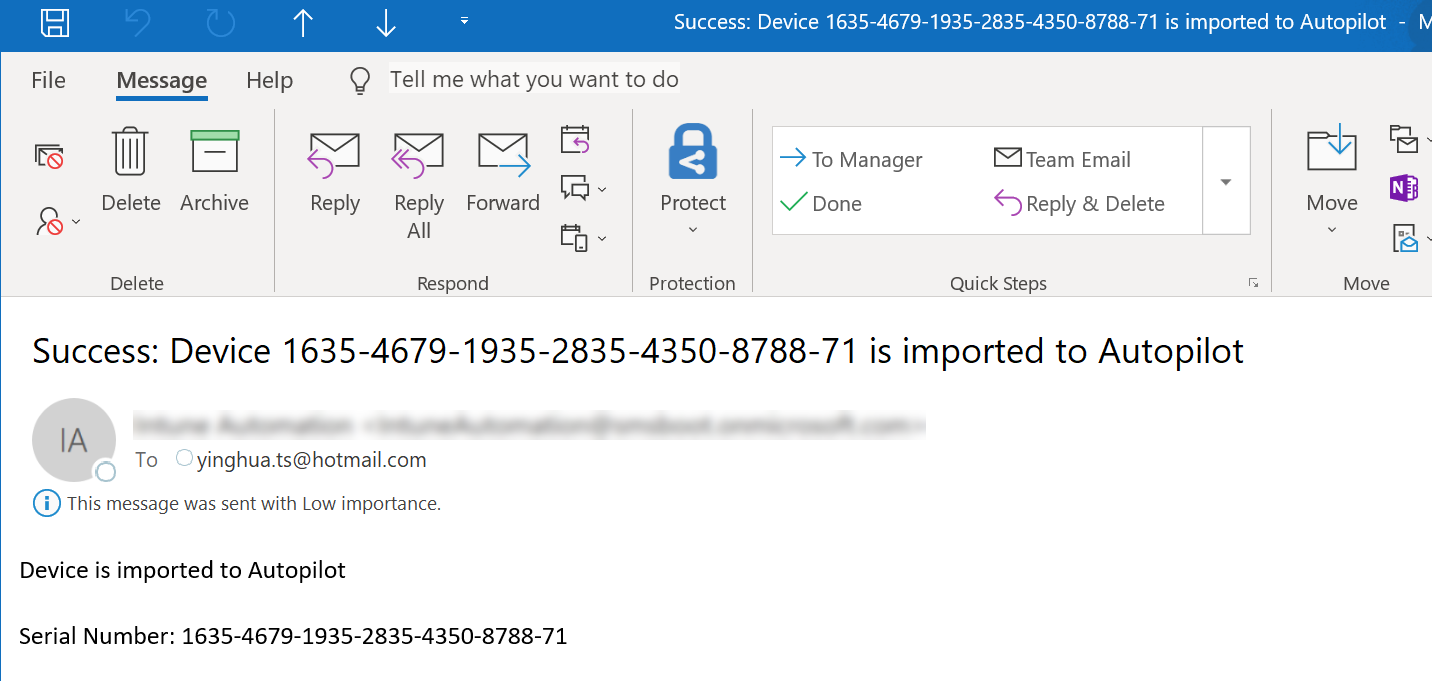
And you should get an email of the result (if you have made the steps to send emails)
Go to Intune portal, you will see your device is imported to Autopilot device list.
Now I am off my laptop and start enjoy summer vacation 🙂
Good evening, Sandy,
Hope my email finds you well, all good?
Question i am using this method and find also your flow. Now i am facing the issue that i cannot import or add the connector.
What could this be?
Thanks for your time and support
Kind Regads,
Dominic
Hello Dominic. I think the example json in my blog post will not work, it was create when the product is called “Flow”, and now it is “Power Automate”. I believe a lot has changed since I wrote the blog post.